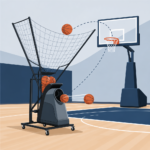


An in-ground basketball hoop cost typically ranges from about $800 for a basic residential setup to more than $8,000 for a premium system with professional installation, site work, and court upgrades. The wide spread confuses buyers because “basketball hoop” can mean very different products: a portable base unit from a big-box store, a wall-mounted goal, or a permanent in-ground basketball hoop anchored in concrete. This guide focuses on permanent systems, which use a buried steel post and concrete footing to create better stability, rebound performance, and durability. If you are planning a home court, driveway setup, or backyard practice area, understanding the true budget matters before you buy.
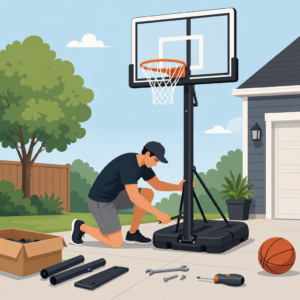
I have helped homeowners compare hoops, installers, and slab requirements, and the same mistake appears repeatedly: people budget for the backboard and rim, then discover that freight, excavation, concrete, and labor add hundreds or thousands more. A permanent hoop is really a small construction project. The total depends on backboard size, post thickness, overhang, breakaway rim quality, footing dimensions, soil conditions, access to the site, and whether you are pouring a new playing surface. Costs also rise if you need old concrete removed, utility lines marked, or a pole pad and net accessories installed.
For readers exploring the broader Basketball Equipment category, this article serves as the central hub for hoops and gear decisions. It explains how in-ground hoop pricing works, what installation includes, how premium features affect play, and where to spend versus save. You will also see how residential systems compare with gym-style equipment, why tempered glass matters, and what maintenance costs look like over time. If your goal is a hoop that feels solid, stays straight, and survives weather for years, the cheapest option is rarely the best value. A clear budget breakdown helps you choose a system that matches both your playing level and your property.
What Determines In-Ground Basketball Hoop Cost
The fastest answer is that materials, labor, and site conditions drive the price. Materials include the hoop itself: post, extension arms, backboard, rim, height-adjustment mechanism, hardware, and anchor kit. A basic in-ground package with a 48-inch acrylic backboard and lighter steel can cost $800 to $1,500. Mid-range systems with a 54-inch or 60-inch tempered glass backboard often land between $1,500 and $3,000. Premium residential hoops with a 72-inch glass backboard, heavier one-piece pole, pro-style padding, and robust breakaway rim can run from $3,000 to $5,500 before installation.
Labor includes digging, setting forms if needed, mixing or delivering concrete, leveling the anchor assembly, erecting the post after curing, and completing final alignment. Professional installation commonly costs $400 to $1,500 for a straightforward job. If access is poor, soil is rocky, or the footing must be larger because of local frost depth, labor rises. In colder climates, installers may excavate deeper to get below the frost line, and that alone changes concrete volume and time on site. Permit requirements are uncommon for a single hoop, but some municipalities or homeowners associations have placement rules that affect cost.
Brand and specification also matter. Recognized residential manufacturers such as Goalrilla, Goalsetter, First Team, and Lifetime occupy very different price tiers. Goalrilla and Goalsetter are often chosen for thicker steel, better welds, and clearer tempered-glass rebound. Lifetime offers lower entry pricing, usually with tradeoffs in rigidity and component quality. If your household includes teenagers or adults who play aggressively, rim and arm construction become more important than many buyers expect. A flimsy support structure can shake after every shot, reducing the playing experience and increasing wear.
Typical Price Ranges by System Type
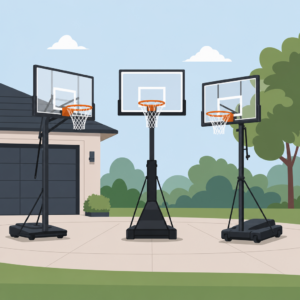
A useful way to budget is to separate hoop cost from installed cost. Entry-level permanent systems usually start around $1,200 to $2,200 installed. These are best for younger players or casual family use, often with 48-inch to 54-inch backboards, lighter poles, and simpler adjustment systems. Mid-range systems usually fall between $2,000 and $4,000 installed and represent the sweet spot for many households. At this level, you can expect a 54-inch to 60-inch tempered glass backboard, stronger offset, and a breakaway rim that handles regular play.
High-end residential systems often cost $4,000 to $7,000 installed. These setups typically feature 60-inch or 72-inch tempered glass, thick steel posts, heavy anchor assemblies, powder-coated finishes, and premium padding. They are the closest match to school or recreation-center play without moving into full commercial gym equipment. For buyers building a dedicated home court, this range usually delivers the best long-term value because the hoop will not become the limiting factor as players improve.
If you are building from scratch, include surface costs too. A hoop installed beside an existing driveway is one project; a hoop paired with a new concrete court is another. A half-court concrete slab can add several thousand dollars, while modular sport tiles over prepared base can add substantially more depending on size and drainage. That is why total home basketball project budgets can range from under $2,000 to well above $20,000 even though the hoop itself occupies only one line item.
| Component | Typical Cost Range | What Affects Price |
|---|---|---|
| In-ground hoop package | $800–$5,500 | Backboard size, glass vs acrylic, steel thickness, brand |
| Shipping or freight | $100–$500 | Weight, carrier, residential delivery surcharge |
| Concrete footing | $150–$600 | Footing size, bagged mix vs ready-mix, local rates |
| Professional installation | $400–$1,500 | Excavation difficulty, curing visits, assembly time |
| Site extras | $0–$2,000+ | Old slab removal, utility locating, grading, access issues |
| Accessories | $50–$600 | Pole pad, backboard pad, lighting, net upgrades |
Installation Steps and Labor Breakdown
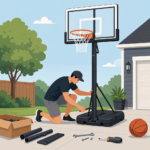
In-ground basketball hoop installation usually happens in two phases. First, the installer marks the location, confirms offsets from the playing area, digs the hole, sets the anchor system, and pours concrete. Many manufacturers specify a footing around 36 to 48 inches deep and 16 to 24 inches wide, but exact requirements vary by model and local climate. You must follow the manufacturer’s engineering specs, not a generic internet diagram, because anchor spacing and embed depth affect safety and warranty coverage.
After the concrete cures, the post and backboard assembly are mounted to the anchor. Cure time is often 48 to 72 hours at minimum, though many installers prefer longer depending on temperature and mix strength. The assembly stage may require multiple people because tempered-glass backboards are heavy and awkward to lift. This is one reason DIY installation is possible but not always smart. A 60-inch or 72-inch glass board can be damaged by improper handling, and replacing it is expensive.
On labor-only jobs, I usually tell homeowners to ask five direct questions: Is excavation included? Is concrete included? Will the installer return for final assembly after curing? Will they haul away spoil dirt? Will they verify plumb and rim height after completion? Those details determine whether a quoted “$500 installation” is truly complete. Some low quotes cover only assembly if the hole and footing already exist. A complete turnkey install is worth more because misaligned anchors are difficult to correct after concrete hardens.
Backboard, Rim, and Pole Choices That Change the Budget
Backboard material has one of the biggest effects on both price and performance. Acrylic and polycarbonate boards cost less, resist shattering, and suit light recreational use, but they do not rebound like tempered glass. Tempered glass delivers the crisp bank-shot response players expect in schools and gyms. Board size matters too. A 54-inch backboard is common for driveways and smaller spaces, while 60-inch and 72-inch boards better support serious shooting drills and more realistic angles. As size increases, support-arm strength must increase with it.
Rim quality is equally important. A static rim is cheaper, but a breakaway rim reduces stress on the backboard and support structure when players pull on the rim or finish hard layups. Better rims use stronger springs and more durable hinge assemblies. If older kids or adults will use the hoop regularly, this is not the place to cut corners. The extra cost is modest compared with the cost of premature wear or cracked mounting hardware.
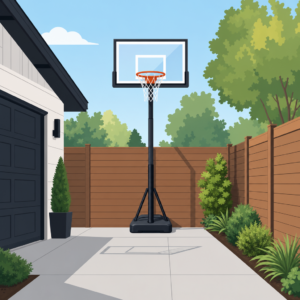
The pole and overhang determine stability and safety. A thicker one-piece steel post vibrates less than lighter sectional posts. Overhang, meaning the distance from the pole to the backboard face, gives players room to move under the basket. Cheap systems often have less overhang, making them feel cramped and increasing the chance of collisions with the pole. Good pole padding helps, but proper structural design matters more. When a homeowner says they want a “gym feel,” they usually mean three things: tempered glass, a quality breakaway rim, and a rigid post with ample offset.
Site Conditions, Concrete, and Hidden Costs
Most surprise expenses come from the ground, not the hoop. Rocky soil slows digging and may require powered augers or hand work. Clay can complicate drainage. Sloped yards may need grading so the hoop aligns correctly with the playing surface. If the hoop is set near an existing driveway, the installer must position the anchor so the rim lands at the correct distance from the edge and leaves enough room for shooting. Errors here cannot be fixed by simply “adjusting the pole later.”
Concrete cost depends on volume and delivery method. Small footings are often filled with bagged concrete mixed on site, while larger or multiple pours may justify ready-mix delivery. Reinforcement requirements vary by product design, but the manufacturer’s instructions govern. If a supplier recommends 12 to 16 bags and the installer plans to use fewer, ask why. Underbuilding the footing is a false economy because an in-ground system transfers repetitive dynamic loads into that base for years.
Hidden costs also include freight surcharges, especially for heavy glass systems delivered to residential addresses. You may also need a liftgate service if no loading dock exists. Utility locating should happen before digging; in the United States, 811 service helps mark underground utilities, but private lines such as low-voltage landscape wiring may still require caution. If an old hoop is being removed, disposal and concrete patching can add cost. For properties in HOA communities, placement approvals may add time even if they do not add much money.
DIY vs Professional Installation
DIY installation can save $400 to $1,500, but those savings only hold if you already have the tools, enough labor help, and confidence reading engineering instructions. At minimum, you need excavation tools or an auger rental, levels, wrenches, bracing materials, and a plan for lifting heavy components safely. The anchor must be set square and plumb, and the concrete must reach the specified strength before loading. A small alignment error can make the backboard sit crooked forever.
Professional installers earn their fee when conditions are imperfect. They know how to brace anchor bolts so they do not shift during the pour, how to account for driveway slope, and how to stage assembly without damaging a glass board. They also work faster. For most homeowners buying a mid-range or premium hoop, professional installation is the safer choice because it protects the larger equipment investment. If you do choose DIY, follow the manufacturer’s manual exactly and never substitute footing dimensions from another model.
One balanced approach is hybrid installation: the homeowner handles excavation and concrete, then pays for final assembly. That can work if the anchor template is installed precisely. However, many installers will not warranty the final result if they did not oversee the footing. Ask in advance. Saving money is good, but preserving structural integrity and warranty coverage is better.
How This Fits Into a Complete Hoops and Gear Plan
As the hub for hoops and gear, this topic is larger than the pole in the ground. A complete setup may include basketballs matched to age and surface, a return system for solo drills, pole padding, court lighting, and training markers. If the hoop sits on a rough driveway, outdoor balls with durable rubber covers make more sense than premium indoor leather models. If players practice at dusk, directed LED sports lighting improves safety more than many accessory upgrades. The best spending sequence is structure first, then surface, then gear.
Think about player development too. Younger children benefit from adjustable-height systems that move smoothly from 7.5 to 10 feet. Teens who are growing quickly need a rim and board that feel consistent as strength increases. Families often outgrow bargain systems within a few seasons, especially when multiple players use the hoop daily. A stronger in-ground model costs more upfront but usually delays replacement for many years, which lowers long-term cost per season of use.
If you are planning related Basketball Equipment purchases, use this page as the starting point. The hoop influences ball choice, safety accessories, practice tools, and even the dimensions of any future court. Buy the permanent structure with your five-year needs in mind, not just this summer’s budget.
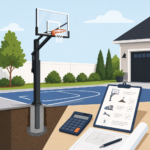
The smartest way to approach in-ground basketball hoop cost is to view it as a total project, not a single product price. Most homeowners will spend somewhere between $1,500 and $4,000 for a solid installed setup, while serious players and dedicated courts often justify $4,000 to $7,000 or more. The final number depends on hoop quality, footing requirements, site conditions, and whether you need extras such as freight, padding, removal work, or a new playing surface. Once you understand those categories, quotes become easier to compare and expensive surprises become less likely.
The best value usually comes from a mid-range or premium in-ground system with tempered glass, a dependable breakaway rim, and professional installation that follows the manufacturer’s footing specifications. Those features improve rebound, stability, and durability in ways players notice immediately. Cheaper systems can work for light family use, but they often show more vibration, less realistic response, and shorter service life. When you are building a hoop for regular practice, sturdier construction pays for itself in better play and fewer problems.
Use this hub to guide your next step in hoops and gear planning. Set your budget, measure your space, compare backboard sizes, and request detailed installation quotes that separate equipment, concrete, and labor. If you do that before you buy, you will end up with a basketball setup that fits your property, supports your players, and delivers years of reliable use.
Frequently Asked Questions
How much does an in-ground basketball hoop cost from start to finish?
An in-ground basketball hoop cost usually falls between about $800 and $8,000 or more, depending on the system you choose and how much work is needed to install it properly. At the low end, you may find a basic residential hoop package with a smaller backboard, lighter steel, and limited adjustability if you handle most of the labor yourself. In the middle of the range, many homeowners spend roughly $1,500 to $3,500 for a better-quality hoop with thicker steel, a larger tempered glass backboard, and either DIY installation or straightforward professional labor. At the upper end, premium systems can exceed $5,000 to $8,000 once you add expert installation, excavation challenges, reinforced concrete, removal of obstacles, and optional court improvements such as surfacing, striping, or lighting.
The biggest reason pricing varies so much is that “basketball hoop” is often used loosely. A portable hoop from a retail store is not the same thing as a permanent in-ground system. A true in-ground hoop uses a buried steel post anchored in concrete, which creates a more stable, durable, and game-like setup. When budgeting, it helps to separate the total cost into categories: the hoop itself, freight or delivery, excavation, concrete, labor, and any site preparation. If your yard is level and accessible, the installed price may stay relatively manageable. If the area needs grading, root removal, demolition, or court work, the final total rises quickly.
What factors have the biggest impact on in-ground basketball hoop installation cost?
Several variables drive the final installed price, and the hoop model is only one piece of the total budget. First, the quality of the system matters a great deal. Entry-level units often use lighter-gauge steel, smaller backboards, and simpler height-adjustment mechanisms, while premium hoops feature heavier posts, larger overhang, tempered glass backboards, and breakaway rims designed for a more authentic playing experience. Those product upgrades alone can move the cost significantly.
Second, site conditions can either keep installation simple or make it much more expensive. A flat, open location with easy access for tools and materials is generally the most affordable scenario. Costs increase if the installer has to work around slopes, tight side yards, existing concrete, underground utilities, drainage concerns, landscaping, or difficult soil. Rocky ground, clay-heavy soil, or areas with poor drainage may require extra digging time, more base preparation, or larger footings. In some cases, local frost depth requirements also affect how deep the footing must be, which changes the amount of labor and concrete needed.
Third, labor and regional pricing matter. Contractors in higher-cost markets typically charge more for excavation, concrete work, and assembly. Some installers include everything in one package, while others quote separately for digging, setting the anchor, pouring concrete, return visits, and final hoop assembly after the footing cures. Delivery fees can also surprise buyers, especially for heavier premium systems. If you are comparing estimates, ask exactly what is included so you are not caught off guard by add-on charges for haul-away, cleanup, or travel time.
Is it cheaper to install an in-ground basketball hoop yourself or hire a professional?
Doing it yourself can lower the total price, but it is not always the best value once you consider time, tools, and the importance of getting the footing right. A DIY installation may save several hundred dollars or more in labor, especially if you are comfortable digging, mixing or ordering concrete, setting an anchor system, and precisely leveling the post. For a straightforward project in easy soil, a handy homeowner may be able to install a hoop successfully and keep the total budget under what a full-service contractor would charge.
That said, professional installation often makes sense for permanent hoops because the foundation is critical to performance and safety. If the hole depth is wrong, the anchor is misaligned, the concrete is inadequate, or the post is not plumb, the hoop may wobble, wear prematurely, or create long-term problems that are costly to fix. Professionals also tend to work faster and more efficiently, especially when dealing with utility marking, difficult soil, heavier systems, or manufacturer-specific installation requirements. Many premium hoop brands either recommend or strongly encourage professional installation to protect product performance and avoid setup errors.
For many homeowners, the smartest middle ground is to compare the true DIY cost against installed quotes. Add up the price of the hoop, concrete, digging tools or equipment rental, delivery, disposal, and the value of your own time. Once those pieces are included, the savings may be smaller than expected. If the area is sloped, rocky, or near existing pavement, professional installation is usually the safer choice.
What is included in a typical in-ground basketball hoop installation estimate?
A standard estimate often includes delivery of the hoop, excavation for the footing, placement of the anchor or post sleeve, concrete for the base, post installation, and assembly of the backboard, rim, and adjustment components. Some companies also include basic site cleanup and a return visit if the system requires the footing to cure before the hoop can be fully mounted. However, not every contractor bundles services the same way, so it is important to ask for an itemized quote.
Common exclusions are where budgets can drift upward. For example, utility locating may be handled separately, especially if private lines need special marking. Additional charges may apply for removing roots, dealing with rock, trenching around drainage issues, demolishing old equipment, or repairing landscaping disturbed during the job. If your hoop is being installed adjacent to a driveway or court, there may be added costs for saw cutting, patching, or ensuring proper clearances. Freight and delivery are also sometimes listed separately from installation labor, particularly on heavier premium systems shipped by freight carrier.
If you want a clear apples-to-apples comparison between bids, ask whether the quote covers the full process from layout to final assembly, how much concrete is included, whether cleanup is part of the price, and if there are any possible surcharge conditions based on soil or access. A good estimate should explain the product model, footing specifications, labor scope, and any assumptions about site conditions.
Are premium in-ground basketball hoops worth the extra cost?
For many buyers, yes—especially if the hoop will get frequent use or if you want a setup that feels closer to a school or gym-style system. Premium in-ground hoops usually justify their higher price through better stability, stronger materials, and a more realistic playing experience. Heavier steel posts reduce shake, larger overhang improves player safety under the basket, and tempered glass backboards provide more consistent rebound performance than lower-end acrylic or polycarbonate options. Better adjustment mechanisms also make it easier to change rim height smoothly for different ages and skill levels.
Durability is another major advantage. A cheaper hoop may look fine on day one, but lighter materials, thinner coatings, and weaker hardware can show wear faster in outdoor conditions. If the hoop is exposed to wind, rain, and year-round use, investing in a more robust model can reduce maintenance issues and extend service life. That does not mean every homeowner needs the most expensive system available. The right choice depends on how often the hoop will be used, who will play on it, and whether long-term performance matters more than upfront savings.
In practical terms, families who just want casual shooting may be happy with a well-reviewed mid-range hoop installed correctly. Households with serious players, taller teens, frequent pickup games, or plans for a dedicated backyard court often find that paying more upfront is worthwhile. The key is to match the hoop’s construction quality and installation method to the level of use you expect, rather than simply choosing the cheapest option and hoping it performs like a commercial-grade system.