
Installing a portable basketball hoop correctly is the difference between years of safe play and a frustrating setup that wobbles, leans, or fails early. A portable basketball hoop is a freestanding system with a weighted base, vertical pole, backboard, rim, and height-adjustment mechanism, designed to deliver driveway or backyard basketball without the permanent excavation required for an in-ground goal. This guide explains how to install a portable basketball hoop step by step, but it also serves as a hub for the broader Hoops and Gear category within basketball equipment, including backboard materials, rim types, bases, anchor methods, maintenance, and accessory choices. I have assembled and adjusted portable systems from entry-level 44-inch models to larger 60-inch tempered-glass units, and the pattern is always the same: careful preparation prevents nearly every problem owners blame on the hoop itself. When installation follows the manufacturer’s sequence, uses the correct ballast, and accounts for surface slope, weather, and user age, a portable hoop can perform remarkably well. For families choosing between systems, coaches outfitting home training spaces, or homeowners replacing an older unit, understanding the full setup process matters because stability, rebound quality, and safety all begin during installation, not after the first game.
Choose the Right Portable Basketball Hoop Before You Install
Before opening the hardware bags, confirm that the hoop matches the players, the location, and the expected use. Portable basketball hoops generally range from 44 to 60 inches wide, with backboards made from polyethylene, acrylic, or tempered glass. Polyethylene is the most forgiving for price and weather resistance, acrylic offers better rebound response and appearance, and tempered glass delivers the closest feel to gym play but adds weight and cost. For younger players, a 44- or 48-inch system with a simple telescoping pole may be enough. For teens and adults who want bank shots to behave predictably, a 54- or 60-inch backboard with a sturdier support frame is worth the upgrade.
The base is just as important as the backboard. Most portable systems rely on water or sand to provide ballast. Water is easier to fill and drain, but it can freeze, evaporate slowly through caps and seams, and shift more during aggressive play. Sand is heavier and usually more stable, but moving or emptying the unit later is far more difficult. Several major brands, including Lifetime and Spalding, specify exact fill capacities and often recommend sand for maximum stability. Check the printed manual rather than guessing. Underfilling the base is one of the most common causes of vibration, pole flex, and dangerous forward movement during rebounds or dunk attempts.
Placement also affects hoop selection. Measure overhead clearance, driveway width, setback from the garage, and the distance from the playing area to the street. A larger overhang keeps the pole farther from the court, reducing collisions on layups. If the court surface slopes noticeably, note that now. Some portable systems tolerate slight grades, but all perform best on flat, solid pavement. If your area sees strong winds, choose a model with a wider base, thicker pole steel, and rear support struts rather than the lightest, cheapest unit available.
Tools, Parts, and Site Preparation
Portable basketball hoop installation goes faster when every tool and part is staged in advance. Most systems require two adults for safe assembly because the backboard and upper pole become awkward long before they become truly heavy. Standard tools include a socket set, open-end wrenches, adjustable wrench, screwdrivers, rubber mallet, step ladder, utility knife, tape measure, and a torque-capable ratchet if the manufacturer lists tightening values. Keep the instruction manual open the entire time. Even experienced installers should not rely on memory because adjustment mechanisms, bracket orientation, and hardware lengths differ by model year.
Lay all parts on cardboard or a blanket to protect finishes and keep fasteners visible. Separate bolts, washers, spacers, locknuts, and cotter pins by step. I always compare every part against the packing list before assembly starts. If one sleeve, pin, or support bracket is missing, stop and resolve it before building the lower sections. Improvising with hardware-store substitutions can create alignment issues or unsafe load points, especially around the rim and lift assembly.
Prepare the site by cleaning the installation area thoroughly. Gravel, leaves, and loose debris under the base can produce a slight rock that becomes obvious only after the hoop is filled and raised. Position the base so there is room to walk around all sides and to tilt the pole into place later. If the hoop will sit at the edge of a driveway, verify that players will have enough runout space beyond the baseline. A portable goal should not force children toward parked vehicles, retaining walls, or traffic.
| Installation Stage | What to Check | Why It Matters |
|---|---|---|
| Unboxing | Match parts to manual and inspect for damage | Prevents assembly delays and unsafe substitutions |
| Site prep | Flat pavement, clearance, debris removed | Improves stability and safe player movement |
| Base filling | Correct ballast type and full capacity | Reduces tipping, vibration, and shifting |
| Pole assembly | Correct orientation of sections and braces | Keeps height mechanism and backboard aligned |
| Final checks | Hardware tight, rim level, adjustments smooth | Ensures safe play and long service life |
Step-by-Step Portable Basketball Hoop Installation
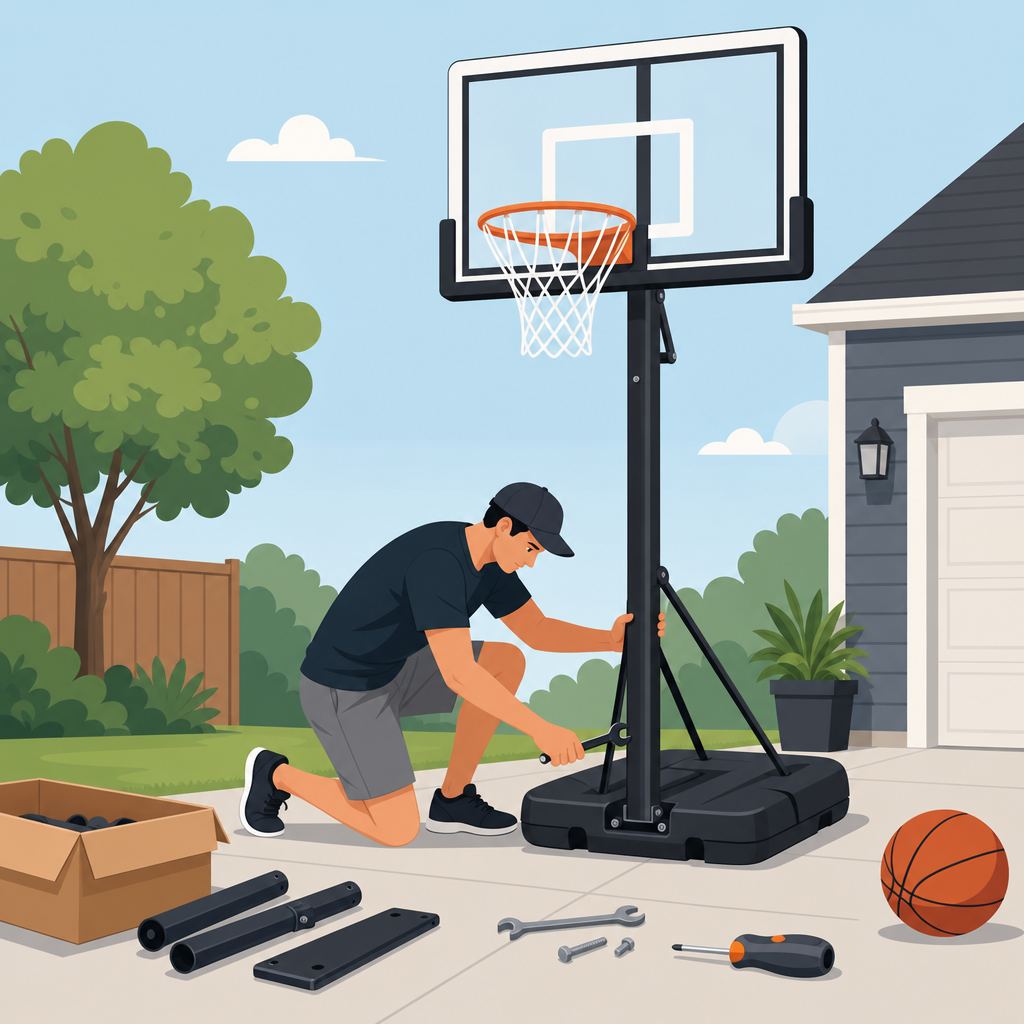
Step one is base assembly. Attach any wheels, axles, cover plates, and pole-mount brackets exactly as illustrated. Do not fully tighten bolts unless the manual tells you to do so; some bases need minor movement while the pole and braces are aligned. If the unit uses a two-piece or three-piece pole, step two is joining those sections on the ground. Pay close attention to front and rear orientation, hole alignment, and labels such as upper, middle, and lower. Hammering a misaligned section together can deform the tubing and ruin the fit.
Step three is connecting the pole to the base structure. This usually involves a pivot point or bolted bracket. Support the pole carefully so it does not twist and scrape the finish. Next, attach rear braces or support arms that transfer load from the backboard into the pole and base. Many first-time installers reverse these braces; the hoop may still stand, but the backboard angle will be wrong and the lift system can bind. Before moving on, tighten all structural fasteners to the point specified by the manufacturer. Locknuts should engage fully, and washers should sit flat without pinching plastic parts.
Step four is assembling the backboard frame, rim plate, and height-adjustment mechanism on the ground. This is where portable hoop installation becomes model-specific. Some systems use a telescoping crank, others a broom-handle style actuator, and others a spring-assisted quick-adjust lever. Install spacers and bushings in the exact sequence shown. If a spring is included, treat it with care; preload components can snap into place suddenly. Mount the rim only after the backboard structure is stable and supported. A breakaway rim must move freely once tightened, while a fixed rim should sit flush without distortion.
Step five is lifting the backboard assembly onto the pole. This almost always requires two adults and, for larger glass systems, sometimes three. Use a ladder on level ground, raise the backboard smoothly, and insert mounting bolts without forcing them. Once the board is attached, cycle the height adjustment through its range before filling the base. If the mechanism catches, the problem is usually reversed linkage orientation, overtightened pivot points, or a brace installed in the wrong hole position.
Step six is adding ballast. Move the hoop into its final location first. Fill the base completely with the approved material. If using water, add a small amount of household bleach only if the manufacturer permits it, since it can limit algae growth inside translucent bases. In freezing climates, many owners use sand instead because frozen water can stress plastic. Install the fill cap tightly, then recheck for leaks around seams and molded inserts.
Leveling, Safety Checks, and Performance Tuning
Once the hoop is upright and weighted, verify that the rim height is exactly 10 feet at regulation setting by measuring from the playing surface to the top edge of the rim. Do not assume factory markings are perfectly accurate. A rim even half an inch off is noticeable in repeated shooting drills. Use a carpenter’s level on the rim and visually inspect the backboard. If the driveway slopes, you may need to rotate the base slightly or relocate it to achieve a more even presentation. Portable systems should never be shimmed with loose scrap wood or bricks, which can slip under load.
Now perform a complete hardware check. Revisit every major connection after the base is filled because the frame settles under weight. Tighten bolts in the pole joint, base bracket, backboard supports, rim mount, and height-adjust pivots. Confirm that safety pins, clips, and cotter pins are fully seated. Test the adjustment mechanism several times from low to high settings. It should move smoothly and lock positively. If it grinds, stop and inspect alignment before anyone plays.
Safety extends beyond the frame. Add pole padding if younger players will use the hoop regularly. For a clearer landing zone, consider a backboard pad on systems that accept one. Even with padding, a portable basketball hoop is not a gymnastics structure. Manufacturers consistently warn against dunking on lightweight residential models, and those warnings exist for good reason. Repeated hanging loads can crack the base, loosen the rim plate, and fatigue the support arms. If the hoop is for older, stronger players, select a heavier model built for that use instead of expecting an entry-level unit to absorb abuse.
Wind management deserves special attention. A portable system should be rolled to a protected area or lowered when severe storms are forecast, especially if the backboard is large. I have seen properly assembled hoops tip in gusts simply because owners left them broadside to the wind on exposed pavement. The larger the glass and the taller the extension arms, the more sail area the unit presents.
Maintenance, Common Problems, and Hoops and Gear Upgrades
A portable basketball hoop installation is not truly finished after assembly; long-term performance depends on periodic maintenance. At least monthly during heavy use, inspect bolts, rim springs, braces, wheel attachments, and the base cap. Temperature swings can loosen hardware over time. Clean the backboard with mild soap and water, not abrasive cleaners that haze acrylic or scratch protective coatings. If the base contains water, check the fill level periodically in hot weather. Small losses are common, and even a partially empty base reduces stability.
The most common complaint is excessive shaking. In my experience, shaking usually comes from one of five issues: underfilled base, loose hardware, an undersized hoop being used aggressively, uneven pavement, or unrealistic expectations about portable systems compared with in-ground units. Some vibration is normal because the pole and support arms are designed to flex under load. What matters is whether the movement settles quickly and the rim remains square to the court.
Another frequent issue is a stiff or uneven height-adjustment system. Lubricate only where the manual allows, usually at pivot points rather than on locking surfaces. If the hoop becomes hard to raise, inspect for bent linkage bars or overtightened shoulder bolts. Replacement parts are often available directly from the manufacturer, and using the correct part number matters because small geometry changes affect the whole mechanism. Cracked base plastics, damaged rims, and faded nets are also common wear items after several seasons.
As the hub page for Hoops and Gear, this guide connects to the broader decisions owners make after installation. A quality basketball matched to the playing surface improves feel more than many people expect; indoor-outdoor composite covers usually outperform cheap rubber on driveways. Net choice affects sound and weather resistance, with all-weather nylon outlasting cotton outdoors. Court markings, anchor weights approved by the manufacturer, rebounders, and ball storage racks can all improve the home setup, but none compensate for poor initial assembly. Start with a stable goal, then build outward.
The key takeaway is simple: install your portable basketball hoop methodically, fill the base fully, verify alignment, and inspect the system before regular play. A well-installed hoop is safer, shoots truer, and lasts longer. If you are building out a complete Basketball Equipment setup, use this page as your Hoops and Gear starting point, then compare backboard materials, rim styles, basketball types, and maintenance needs based on who will play most often. Read your manual, take your time, and set the hoop up right the first time.
Frequently Asked Questions
1. What tools and materials do I need before installing a portable basketball hoop?
Before you begin, gather everything you need so the installation goes smoothly from start to finish. Most portable basketball hoop systems require a socket set or adjustable wrench, open-end wrenches, screwdrivers, pliers, a rubber mallet, a sturdy ladder, and safety gloves. Many manufacturers also recommend a torque wrench so bolts can be tightened to the correct specification without over-tightening and damaging the frame. In addition to tools, have the owner’s manual ready, since portable hoops can vary in pole design, backboard attachment method, and height-adjustment hardware.
You should also prepare the base-filling material in advance. Most portable hoops are designed to be weighted with either water or sand. Water is easier to add and remove, but sand is usually heavier and more stable, especially in windy areas or on hoops with larger backboards. Some homeowners choose water for convenience and then add antifreeze in colder climates if the manufacturer allows it. It is equally important to have enough installation space. Lay out all parts on a flat surface and confirm that the pole sections, base, backboard, rim, braces, hardware packs, and adjustment mechanism are all present before assembly begins.
One of the best ways to avoid delays is to sort bolts, washers, and nuts by size before you start. That simple step reduces confusion and makes it easier to follow the step-by-step instructions. If the hoop is heavy-duty or has a large tempered-glass backboard, having a second adult available is strongly recommended. Portable basketball hoop installation is much easier, safer, and faster when one person stabilizes parts while the other secures hardware.
2. What is the correct step-by-step process to install a portable basketball hoop safely?
The safest and most effective way to install a portable basketball hoop is to follow the sequence designed by the manufacturer, but the general process is consistent across most systems. First, position the base on a flat, solid surface such as a driveway or patio area where the hoop will ultimately be used. Next, assemble the lower, middle, and upper pole sections according to the manual, making sure alignment holes face the proper direction. Tighten hardware securely, but do not fully torque every connection if later steps require slight movement for alignment.
After the pole is assembled, attach it to the base if your system requires that step before the backboard goes on. Some models use support braces that connect the pole to the base for extra rigidity, and these should be installed exactly as shown in the manual. The next major step is assembling and mounting the backboard and rim. This is usually the most awkward part of the installation because of the size and weight of the components. With help from another adult, attach the rim to the backboard, connect any reinforcement brackets, and then secure the backboard assembly to the pole or lift frame.
Once the backboard is mounted, install the height-adjustment mechanism, handle, or actuator arm if it is not preassembled. Carefully inspect all moving parts to ensure they operate freely without binding. Only after the full structure is assembled should you fill the base with the recommended ballast material. Filling the base too early can make repositioning difficult, and assembling the upper components before the base is stable can create a tipping hazard. After the base is filled, recheck all bolts, verify the pole is upright, test the height-adjustment system, and gently shake the goal to confirm it feels secure. The final step is a safety review: confirm the hoop is level, the base cap is sealed, and all hardware is properly tightened before anyone begins playing.
3. Should I fill the base with water or sand, and how much weight does the base need?
In most cases, the base should be filled with exactly the amount and type of ballast specified by the manufacturer. That recommendation is important because the base weight is what keeps a portable basketball hoop stable during shooting, rebounding, and light gameplay. Water is often the most convenient option because it is easy to pour in with a garden hose and simple to drain if the hoop needs to be moved. However, water can evaporate slowly, may freeze in cold weather, and usually provides less overall stability than sand.
Sand is generally the better choice if you want maximum stability and long-term performance. It is denser, less likely to shift dramatically during use, and better suited for larger hoops with bigger backboards or more aggressive play. The tradeoff is that sand is harder to install and remove, and moving a sand-filled base can be much more difficult. Some users choose a mixed approach only if the manufacturer specifically permits it, but you should never improvise with unapproved materials because that can affect balance, structural stress, and warranty coverage.
As for how much weight the base needs, the answer depends on the hoop model. Smaller youth-oriented portable goals may require far less ballast than regulation-style units with 54-inch, 60-inch, or 72-inch backboards. The correct amount is listed in the product manual and should never be estimated. Underfilling the base is one of the most common causes of wobbling, leaning, and unsafe movement. If your hoop includes a front extension or wheel assembly, remember that proper weight distribution is part of the design. For the safest setup, fill the base to the manufacturer’s line or capacity, secure the cap tightly, and periodically inspect the ballast level over time, especially if water is used.
4. Why does my portable basketball hoop wobble or lean after installation, and how can I fix it?
A small amount of movement is normal in many portable basketball hoop systems, especially during aggressive play or when the rim is struck. However, excessive wobbling or a visible lean usually points to an installation issue, an uneven surface, or insufficient ballast. The first thing to check is whether the hoop is sitting on level ground. Portable systems perform best on flat concrete or asphalt. If the base is placed on a sloped driveway, uneven pavers, or soft ground, the pole may appear crooked even if the assembly itself is correct.
Next, inspect every major connection point. Loose bolts at the base, pole joints, backboard frame, or support braces are a common cause of instability. Go back through the manual and verify that all washers, lock nuts, and brackets were installed in the correct order. It is also worth confirming that the pole sections are fully seated and aligned properly. If one section was assembled backward or not inserted completely, the entire system can look off-center. Another frequent problem is an underfilled base. If the ballast level is below the recommended capacity, the hoop may rock, shift, or lean during normal use.
If the hoop still leans after tightening hardware and checking the surface, look closely at the adjustment mechanism and backboard mount. Misaligned lift arms or uneven bracket tension can pull the backboard slightly out of position. In some cases, disassembling and reinstalling the upper section is the best fix. Also inspect for shipping damage or bent metal parts, especially if the lean is severe and consistent. The key is to address the cause early. Continuing to use a wobbling or leaning hoop can place extra stress on the frame and shorten the life of the system. A correctly installed portable hoop should feel solid, upright, and predictable in everyday play.
5. How do I maintain a portable basketball hoop after installation to keep it safe and durable?
Once your portable basketball hoop is installed, regular maintenance is what protects your investment and keeps gameplay safe. Start with routine hardware checks. Over time, vibration from shooting, rebounding, weather changes, and repeated height adjustments can loosen nuts and bolts. Inspect the rim, backboard supports, pole joints, and base connections every few weeks during heavy use, and tighten anything that has worked loose. It is also smart to inspect the net, rim springs if applicable, and adjustment handle for signs of wear.
The base deserves special attention because it is the foundation of the entire system. If it is filled with water, check periodically for leaks, evaporation, or cracking, especially during hot summers and freezing winters. If sand is used, make sure the fill cap remains tightly sealed so moisture and debris do not get inside. Clean the pole and backboard regularly to remove dirt buildup, and watch for rust, corrosion, or flaking paint on metal components. If you notice rust beginning to form, treat it early before it spreads and weakens the structure.
Weather protection is another major factor in long-term durability. Strong winds can stress a portable hoop far beyond normal play conditions, so if severe weather is expected, lower the height if recommended, move the unit to a protected area if possible, or follow the manufacturer’s storm guidelines. Avoid hanging on the rim unless the hoop is specifically rated for that kind of play. Finally, review the owner’s manual at least once after installation and again seasonally. Portable basketball hoops are designed for convenience, but they still require proper care. With consistent inspection, correct ballast management, and prompt attention to wear, a well-installed hoop can provide many years of stable, safe, and enjoyable use.