
The off-season is where basketball shooters are built, because it provides the uninterrupted time needed to change mechanics, add strength, and stack enough quality repetitions for those gains to hold up under pressure. When players ask how to improve your basketball shot in the off-season, they usually mean more than making open jumpers in an empty gym. They want a repeatable shot, better range, quicker preparation, and the confidence to hit when defenders close hard and fatigue sets in. A smart off-season shooting plan solves all of those problems by combining skill work, physical development, film review, and measurable benchmarks across several months.
In practical terms, improving your shot means refining the full shooting chain: stance, footwork, balance, hand placement, release path, arc, depth, rhythm, and follow-through. It also means building the physical capacities that support shot quality, including ankle mobility, hip stability, thoracic extension, scapular control, wrist strength, and lower-body force production. I have seen players waste entire summers by chasing makes instead of fixing the reasons they miss. A made shot can hide poor sequencing; a structured plan exposes it. That is why the best programs track not only percentage, but also shot type, location, footwork pattern, time to release, and how mechanics change as intensity rises.
For this Basketball Training hub on programs and workouts, the goal is to give you a complete month-by-month framework that works for youth players, high school guards, wings preparing for AAU or varsity seasons, and adult players returning to competition. The exact volume should change with age and training history, but the progression should not. Early off-season work is for assessment and rebuilding. The middle phase is for volume and skill expansion. Late off-season work is for game transfer. If you follow that order, you improve faster and keep more of what you gain once the season starts.
Another reason the off-season matters is that shot development is cumulative. Research and practical tracking both show that consistency comes from thousands of technically sound reps, not random marathons. Deliberate practice beats casual repetition because the nervous system learns the pattern you repeat most often. If your workouts start too far from your current skill level, you rehearse misses. If they stay too easy, you never prepare for game speed. The answer is progressive overload for shooting: begin with controllable form shooting, layer in movement and range, then test everything under decision-making and fatigue. That is the core idea behind every effective basketball shooting workout.
Month 1: Assess, Rebuild, and Clean Up Mechanics
The first month should be diagnostic, not ego driven. Before changing anything, record video from the front, side, and behind during form shooting, free throws, spot-up threes, and movement shots. Use slow motion on a phone or apps such as Hudl Technique, OnForm, or HomeCourt to check whether the ball stays on the shooting side, whether your guide hand stays quiet, and whether your base stays stable through release. I start most players with a baseline chart: 25 one-hand shots from three to eight feet, 25 free throws, 50 midrange catch-and-shoot attempts, and 50 threes. That profile shows whether the issue is touch, alignment, range, or rhythm.
Mechanical priorities in Month 1 should stay narrow. Most players need only two corrections at a time. Common fixes include straightening a thumb-heavy guide hand, reducing unnecessary dip on quick catches, aligning the shooting elbow under the ball instead of forcing it unnaturally inward, and improving landing balance. This is also the month to rebuild your lower-body pattern. Your feet create your shot timing. If your one-two step and hop footwork are inconsistent, your upper body will constantly compensate. Spend time on stationary catches, step-ins from different angles, and clean pickups off the dribble before you worry about deep range.
Strength and mobility work should support the technical rebuild. If a player struggles to keep the chest tall and the release smooth, I usually check ankle dorsiflexion, hip internal rotation, thoracic mobility, and shoulder control. Tight ankles and stiff hips often force a player into a backward lean. Weak scapular stabilizers can lead to a drifting elbow and inconsistent release path. Two or three weekly lift sessions are enough in this phase: goblet squats, split squats, Romanian deadlifts, calf raises, rows, push-ups, landmine presses, and anti-rotation core work. The goal is not max strength yet; it is cleaner movement that lets the shot repeat.
Month 2: Build Volume, Touch, and Repeatable Footwork
Once your mechanics are stable, Month 2 becomes a volume block. This is where a basketball shooting program starts to feel like training instead of rehab. The target is high-quality repetition from game-relevant spots without losing the checkpoints established in Month 1. A useful weekly structure is three primary shooting days, two lighter touch days, two strength sessions, and one recovery emphasis day. Primary shooting days can include 150 to 300 made shots depending on age and level. Younger players may count attempts and time instead; advanced players should count makes by category because volume without standards is misleading.
Touch development belongs here because many shooting problems are really touch problems. Short-range one-hand form shooting teaches the ball to come off the index-middle finger line cleanly and with proper rotation. Floaters, runners, and free throws improve feel and trajectory. Around-the-world midrange shooting teaches distance control before players stretch beyond the arc. I like to keep at least 20 percent of Month 2 shots inside 10 feet and at least 20 percent at the foul line or one-step-inside areas. Players often think they need more threes, but if the ball does not leave the hand cleanly at short range, adding distance usually magnifies the flaw.
Footwork should now become automatic. Every shooter needs command of the one-two, the hop, inside-foot turn, and drift footwork from the corners. If you are a guard, add pull-up series from both hands, snake dribbles into the lane, and retreat dribble rebalances. If you are a wing or forward, add corner lifts, slot relocations, and shots after screening actions. The point is specificity. A point guard who never shoots after changing pace will not suddenly become efficient off the dribble in November. A catch-and-shoot specialist who ignores corner drift footwork will struggle on kick-out threes.
| Month | Primary Focus | Sample Shooting Goals | Strength and Recovery Emphasis |
|---|---|---|---|
| 1 | Assessment, mechanics, balance | 100 to 150 makes per session, mostly form and spot shooting | Movement quality, mobility, basic strength |
| 2 | Volume, touch, footwork consistency | 150 to 300 makes, tracked by spot and footwork type | Foundational strength, tendon capacity, sleep routine |
| 3 | Range, speed, movement shooting | Game-speed catch-and-shoot and pull-up benchmarks | Power work, deceleration, sprint mechanics |
| 4 | Game transfer, pressure, decision-making | Timed drills, contested reps, conditioning-based accuracy | Maintenance lifting, freshness, tissue recovery |
Month 3: Extend Range and Add Game-Speed Complexity
Month 3 is where many players either level up or undo their progress. Extending range does not mean heaving from deeper spots with broken form. Real range comes from sequencing force from the floor through the hips and trunk into a compact release. When a player says, “I have to jump higher to shoot farther,” that usually means the energy transfer is poor. In this phase, keep the same release shape and use the legs better. Medicine-ball scoop tosses, pogo jumps, snap-downs, and low-volume jump training can help, but the technical work remains the main driver. If your shot gets flatter as distance increases, lower the load and rebuild.
This month should introduce speed and movement. Add sprint-to-catch threes, pin-down footwork, flare catches, relocation shooting after penetration, and pull-ups after hard changes of direction. Use a passer if possible; if not, use a toss, spin-out, or rebound-and-relocate setup, but be honest about whether it matches game timing. Many solo workouts overstate skill because the player knows exactly where the ball is going. To create uncertainty, vary the pass angle, start from different spots, and add simple cues such as “shot,” “drive,” or “one dribble left.” These constraints force faster preparation and reveal whether the shot holds up when the brain has to decide.
Conditioning also starts to matter more in Month 3. Not endless running, but basketball-specific repeat efforts. A player may shoot 75 percent in a calm drill and 42 percent after three hard transitions, a closeout attack, and a relocation. That gap is useful information. Build drills that raise heart rate without destroying mechanics: five down-and-back sprints into five corner threes, or a sequence of wing catch, rim finish, defensive slide, and wing pull-up. The goal is to preserve alignment and touch under elevated fatigue. That is what separates practice shooting from game shooting.
Month 4: Convert Skill Gains Into Game Results
The final month before organized team activity should look the most like competition. Your shot work now needs defenders, time limits, score pressure, and role-specific decision-making. If you are a lead guard, emphasize pick-and-roll pull-ups, pocket-pass repositions, and late-clock threes. If you are an off-ball wing, prioritize corner threes, slot catches after drive-and-kick action, and one-dribble side-step counters. If you are a big who faces up, add trail threes, elbow jumpers, and short-roll touch shots. Programs and workouts only matter if they connect directly to the shots you will actually get.
Pressure shooting is not just motivational; it changes behavior. Timed drills such as “make 7 of 10 from five spots in under three minutes” force quick setup and immediate reset after misses. Competitive standards matter too. For varsity-level perimeter players, reasonable off-season benchmarks might be 70 percent or better on uncontested high school threes in workouts, 80 percent on free throws across large samples, and visible consistency on movement shots from the corners and wings. College-level standards rise from there. The exact number is less important than honest tracking over several weeks. Trends matter more than one hot day.
By Month 4, lifting should shift to maintenance and freshness. Two shorter sessions per week usually work better than heavy lower-body fatigue that steals lift from your jumper. Keep unilateral leg work, posterior-chain strength, and upper-back training, but trim volume. Recovery becomes performance work. Sleep seven and a half to nine hours, hydrate aggressively, and protect the wrists, knees, and Achilles with sensible workload management. If soreness changes your landing or release timing, your shooting data becomes unreliable. The best off-season plans treat recovery as part of skill acquisition, not an optional extra.
How to Structure Weekly Programs and Workouts That Actually Work
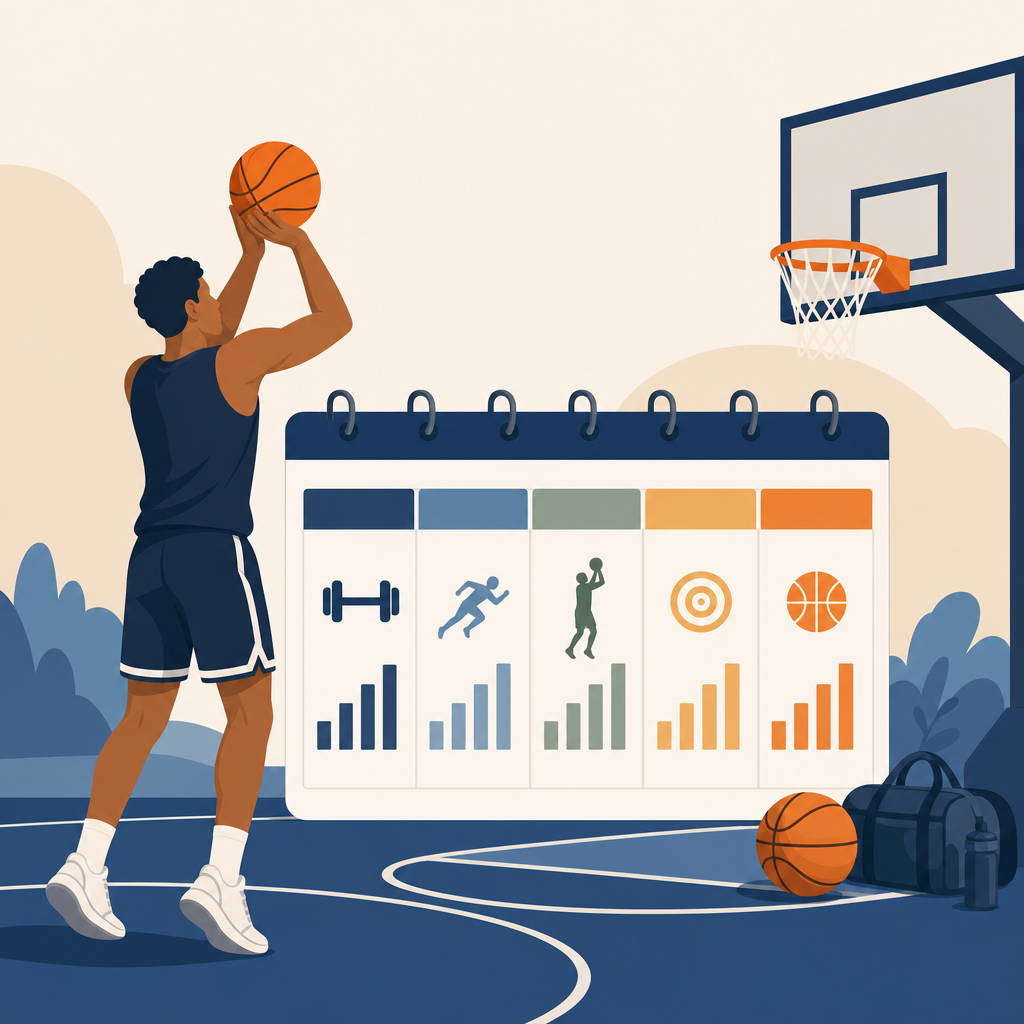
A month-by-month plan succeeds only if the weekly schedule is realistic. Most players improve faster with four to five focused court sessions than with daily marathons. A strong template is two high-volume shooting days, one movement-and-decisions day, one pressure-and-conditioning day, and one lighter form-and-free-throw day. Layer in two strength sessions and at least one low-intensity recovery block with mobility, light ball handling, and film. This distribution prevents the classic off-season mistake of doing too much too soon, then practicing poor mechanics because the body is cooked by midweek.
Tracking is essential for a hub topic like programs and workouts because it turns advice into a system. Record makes and attempts by spot, footwork pattern, and shot type. Note how many were stationary, off the catch, off one dribble, and after movement. If possible, add release-time data using video. Once players see that their left-to-right pull-up is 15 points worse than their right-to-left pull-up, training gets targeted immediately. That is how serious basketball training works. Build the plan around evidence, review film every two weeks, and adjust the next month based on what the numbers and video actually show. Start this off-season with a calendar, a notebook, and a standard you will not lower.
The best off-season shooting plan is progressive, measurable, and specific to your role. Start by assessing mechanics and movement quality. Build touch and footwork before chasing deeper range. Add speed, complexity, and fatigue only when the shot stays repeatable. Finish by rehearsing the exact shots you must make in games, under time pressure and realistic conditioning. This sequence works because it respects how skill development really happens: stable pattern first, then volume, then transfer.
If you remember one principle, make it this: do not train for highlights, train for repeatability. A reliable jumper comes from hundreds of small decisions made correctly over months, from where your feet land to how you recover between sessions. Players who approach the off-season this way enter the season with more than a prettier stroke. They have a shot they can trust. Use this month-by-month plan to organize your Basketball Training, track your progress honestly, and build workouts that lead to game results. Then get in the gym, film your first session, and begin.
Frequently Asked Questions
1. What should a month-by-month off-season shooting plan actually look like?
A strong off-season shooting plan should progress from rebuilding to reinforcement, not just pile on random workouts. In the first month, the priority is evaluation and shot cleanup. That means filming your jumper, identifying one or two mechanical changes that matter most, and reducing variables so you can build consistency. Most players benefit from starting with form shooting, stationary catch-and-shoot reps, and controlled one-dribble pull-ups. The goal is not volume for the sake of volume. It is learning how the ball should leave your hand, how your feet should arrive, and how your upper and lower body should work together every time.
In the second month, you begin layering in range, rhythm, and movement. Once your mechanics are more repeatable near the basket and at mid-range, you gradually extend to the high school, college, or pro three-point line depending on your level. This is also the right time to add game-like footwork such as hop gathers, 1-2 steps, drift actions, relocation shooting, and shooting off different angles of the pass. You are still protecting your mechanics, but now you are asking them to hold up at greater distances and at a slightly faster pace.
In the third month, the plan should become more competitive and more specific to how you actually play. That means shooting under time pressure, adding defenders or contests, and using drills that force quick decision-making. A guard may emphasize pull-ups, step-ins, and shooting out of ball screens, while a wing may focus on corner threes, slot threes, and attacking hard closeouts into one- or two-dribble jumpers. A big may work heavily on pick-and-pop shooting, short-corner touch, and trail threes. The final stage of the off-season should blend skill, conditioning, and pressure so your shot does not fall apart when your legs get heavy.
A simple framework is month one for mechanics, month two for expansion, month three for game transfer, and the final weeks before preseason for sharpening. That progression gives you the best chance of showing up with a cleaner shot, deeper range, quicker preparation, and more confidence, instead of just saying you “got a lot of shots up.”
2. How many shots should I be taking each week during the off-season to really improve?
The best answer is enough quality repetitions to create change, but not so many that fatigue ruins technique. For most players, a productive off-season target is between 1,500 and 3,500 made shots per week depending on age, training history, and schedule. Younger players or athletes still learning basic mechanics should stay on the lower end and focus on precision. More advanced players with solid movement quality and recovery habits can handle more volume, especially if their workouts are divided into focused blocks instead of one marathon session.
What matters most is how those reps are organized. Early in the off-season, a higher percentage of your shots should come from form work, close-range shooting, and controlled game spots. As your mechanics improve, your volume from movement shooting, three-point range, and pressure drills can increase. A useful split might be 30 to 40 percent form and foundational work, 30 to 40 percent game-location catch-and-shoot reps, and 20 to 30 percent off-the-dribble, movement, or fatigue shooting. That balance changes as the summer goes on, but it prevents the common mistake of spending every workout launching rushed threes before your base is stable enough to support them.
You should also track makes, not just attempts. Attempts can hide poor concentration. Makes tell you whether your mechanics and focus are holding up. For example, instead of saying you shot for an hour, record that you made 200 form-to-midrange shots, 150 catch-and-shoot threes from five spots, and 75 off-dribble jumpers going both directions. That kind of tracking creates accountability and makes it easier to spot trends. If your percentages collapse when you move left, shoot from the corners, or shoot late in a workout, that is valuable information.
Finally, remember that shooting improvement is not built by volume alone. Recovery, strength training, sleep, and smart programming all affect your jumper. If your shoulders are overworked, your legs are dead, or your wrists are sore, more shots may actually teach worse habits. The right number of shots is the number you can perform with intent, feedback, and repeatable mechanics day after day.
3. Should I change my shooting mechanics in the off-season, and if so, how do I do it without ruining my shot?
Yes, the off-season is the best time to change mechanics, but only if you do it carefully and selectively. The biggest mistake players make is trying to rebuild everything at once. You do not need a completely new jumper just because your shot feels inconsistent. Usually, one or two flaws create most of the problem. It may be a low or slow dip, a drifting base, poor balance on the gather, a guide hand that interferes, or a release that changes depending on speed and distance. The goal is to identify the issues that most affect consistency and efficiency, then attack those first.
The safest approach is to start with video and comparison. Film your shot from the front, side, and behind at close range, mid-range, and three-point distance. Look for whether your feet are arriving consistently, whether your hips and shoulders are aligned, whether the ball path is clean, and whether your release point and follow-through stay stable. If possible, get input from a qualified coach who understands shooting mechanics and can separate cosmetic differences from true problems. Not every unusual-looking shot needs fixing. What matters is whether the motion is repeatable, quick enough for your level, and able to hold up under pressure and fatigue.
When you do make a change, narrow your focus. Spend several weeks exaggerating the corrected movement in low-speed, low-pressure reps. Begin close to the rim so you can feel the adjustment without forcing power. Gradually extend your range only after the motion feels natural. Then add footwork, movement, and finally defenders. This progression matters because new mechanics are fragile. If you rush into game-speed threes too early, your old habits usually return. That is why the off-season is so valuable. It gives you enough uninterrupted time to build a new pattern before competition demands speed and improvisation.
You should expect a temporary dip in comfort and even shooting percentage while the change settles in. That is normal. The key is to avoid panic. Trust the process, use video regularly, and judge progress over weeks, not days. If the adjustment improves your alignment, release efficiency, balance, and shot preparation, it is probably worth sticking with. If a change creates more tension, slows you down, or makes you inconsistent at every distance, reassess before you lock in bad work. Good mechanical changes make your shot simpler, more repeatable, and easier to reproduce when the game speeds up.
4. How do I build more range and a quicker release without sacrificing accuracy?
Better range and a faster release come from efficient sequencing, not from muscling the ball. If you have to force deep shots with your shoulders and arms, your mechanics are not transferring power well from the ground up. True range starts with balance, footwork, and timing. Your feet need to get set or nearly set on time, your hips need to load smoothly, and your shot pocket has to stay compact enough that you do not waste motion before the release. Players who improve range the right way usually are not getting dramatically stronger in their wrists. They are learning to coordinate their entire body more efficiently.
In practice, that means training range in stages. First, make sure you can shoot with clean mechanics from close range and mid-range. Then gradually move back while keeping the same rhythm, arc, and follow-through. If the shot flattens badly, your elbow flies out, your body leans, or your guide hand takes over, you are too far out for quality work. Move in, re-establish proper mechanics, and build back from there. This is one of the most important rules of off-season shooting. Do not practice heaving. Practice scalable mechanics.
To speed up your release, train your preparation as much as your release itself. A quick shot often starts before the catch. Learn to show your hands early, get your feet into position before the ball arrives, and move the ball cleanly from catch to shot pocket. Many players think they need to snap their wrist faster when the real issue is that their feet are late or the ball drops too low before the upward motion. Drills such as quick-catch shooting, short-window closeout shooting, and “decision on the catch” reps are useful because they teach you to organize your body sooner.
Strength training also plays a role, especially in the lower body and trunk. Stronger legs help maintain range late in workouts and late in games, while better core control helps you stop drifting and stay centered. But strength should support mechanics, not replace them. The best off-season plan combines technical shooting work, progressive distance shooting, fast-prep footwork drills, and enough strength and recovery work to keep your body fresh. That is how you create a jumper that is both deeper and faster without losing touch.