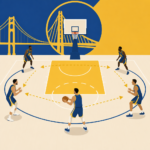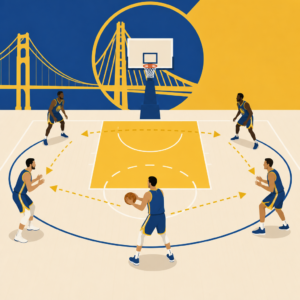


Video is one of the fastest ways to diagnose and fix your own basketball game because it turns vague feelings into visible evidence. Most players know when a jumper feels off, when drives stall, or when they keep losing their man on defense, but they cannot always explain why. Film and analytics solve that problem. In basketball training, film means recorded possessions, drills, and scrimmages reviewed with a purpose. Analytics means measurable patterns drawn from that footage, such as shot location, turnover type, closeout speed, paint touches, or points allowed per action. Used together, they help players see what actually happened, not what they remember happening.
This matters because improvement usually stalls at the point where self-awareness stops. I have seen players train hard for months on the wrong fix because they guessed at the root cause. A guard who thinks he needs a quicker release may really need earlier shot preparation. A wing who blames poor finishing may actually create bad angles with his last two steps. A post defender who believes he lacks strength may be getting sealed because his top foot is too high in transition. Video catches those details frame by frame. Analytics then tells you whether the issue is occasional or a true habit.
As a sub-pillar hub for basketball training, this guide covers the complete film and analytics workflow: what to record, how to tag clips, which metrics matter, how to connect observations to drills, and how to track whether changes hold up in games. The goal is not to make every player a data scientist. The goal is to build a repeatable review system that answers practical questions: Why am I missing this shot? Why do I turn it over here? Why do teams target me on defense? Which skill gives me the biggest return next week?
If you can record a phone video, organize possessions, and review with honest criteria, you can create your own performance lab. Even simple tools such as Hudl, FastModel, HomeCourt, Google Sheets, or a notes app can support serious self-scouting. The key is using them consistently. Great film study is not random watching. It is structured diagnosis, followed by targeted correction, then re-testing under game speed. That cycle is how players make visible progress and keep it.
Build a self-scouting process before you chase fixes
The first step is recording the right material. For most players, that means three video buckets: individual workouts, small-sided games, and full five-on-five play. Workouts show mechanics in controlled conditions. Small-sided play shows decisions under moderate pressure. Full games show whether the habit survives real pace, fatigue, spacing, and scouting. I recommend filming from a high sideline angle whenever possible because it captures spacing, help defense, and off-ball movement better than baseline-only video. If you only have one phone, stable and wide is more useful than close and shaky.
Next, set review categories before watching. Without categories, most players simply relive makes and misses. Strong categories include shooting, finishing, handle under pressure, passing reads, pick-and-roll decisions, transition habits, on-ball defense, off-ball defense, rebounding, screening, and communication. Inside each category, define what counts. For shooting, track feet set on catch, dip consistency, release time, shot quality, and result. For defense, track stance, first step, screen navigation, tag responsibility, closeout control, and contest quality. Definitions reduce bias and make clips comparable from week to week.
Then separate symptoms from causes. A missed three is a result, not always the problem. The cause may be drifting left, catching high and loading low, late eye focus, poor shot selection, or fatigue after a long closeout. A turnover against pressure may start with a loose handle, but it may also come from poor spacing, leaving your feet to pass, or refusing the simple outlet. Film review becomes powerful when you pause before the event and ask what created it two seconds earlier. Basketball is a chain of linked decisions and body positions.
Create a tagging system that fits your level. At minimum, label each clip by quarter or drill, possession type, action, and outcome. Example: “Q2, side pick-and-roll, pocket pass late, turnover.” Better systems add context such as left versus right hand drive, defender coverage, score, and fatigue level. Keep notes short and objective. Over time, patterns emerge quickly. If eight of twelve right-hand drives end with pickups too early, that is a training priority. If weak-side help beats your spin move nearly every time, your read is the issue, not your confidence.
Use film to break down offense into teachable details
Most offensive mistakes become obvious when you slow footage to half speed. Start with shooting because it is easy to quantify and usually tied to repeatable mechanics. On catch-and-shoot attempts, look at preparation before the ball arrives. Are your hands ready early? Are your hips turned into the pass? Do your feet land in balance without extra hops? I often find that players who call themselves streaky are simply inconsistent in preparation. Their release changes because the catch changes. Film lets you compare ten makes and ten misses and identify the common difference.
For off-the-dribble scoring, study the sequence into the shot, not just the finish. Good creators win with pace changes, shoulder leverage, and efficient footwork more than with fancy moves. Review whether your setup shifted the defender, whether you attacked the correct hip, and whether your gather created a direct line to the rim. If your pull-up feels contested, count how often you fail to get the defender on your back foot first. If your layups get blocked, check whether your inside shoulder exposed the ball or whether your last step was too short. Those are trainable mechanics.
Passing film should answer one question clearly: did you see the right read on time? I like to separate passing errors into vision, timing, angle, and delivery. Vision errors happen when the read is missed entirely. Timing errors happen when the read is recognized too late. Angle errors happen when the body position closes the passing window. Delivery errors happen when the read and timing are correct but the pass lacks speed, touch, or location. This framework is simple enough for youth players and detailed enough for advanced guards running complex pick-and-roll coverages.
Analytics sharpens the picture by turning clips into rates. Instead of saying, “I struggle finishing left,” calculate your left-hand rim attempts, conversion rate, foul rate, and turnover rate over ten games. Instead of saying, “I force passes,” chart live-ball turnovers by type. That distinction matters because live-ball turnovers often create transition points the other way. When I chart offense with players, we prioritize metrics linked to possession value: effective field goal percentage by zone, points per pick-and-roll possession, turnover percentage, assist-to-turnover ratio, and paint touches per game. Better process usually lifts those numbers.
Use defensive video to find the possessions that really swing games
Players often underestimate how many points they give away without being directly scored on. Film exposes those hidden losses. Begin with transition defense. Pause as the shot goes up and ask where you are, who you are responsible for, and whether your first three steps are toward the paint or toward watching the ball. Teams concede easy baskets because one player admires a shot, jogs after a turnover, or matches up too late. Those clips are uncomfortable, but they are highly fixable because the standard is clear and measurable every possession.
In the half court, review defense in layers: containment, help, recovery, and finish. Containment asks whether you kept the ball from gaining an advantage. Help asks whether you were in the correct support position. Recovery asks whether you closed the gap under control. Finish asks whether the possession ended with a clean rebound or a second chance. Many players focus only on the one-on-one result. Coaches do not. They grade whether you fulfilled the scheme. You can lose a rep while still executing the scheme correctly, or stop a drive and still fail the possession by missing the low man rotation.
Screen defense deserves special attention because it combines technique with decision making. On video, identify the coverage first: drop, switch, show, ice, weak, or blitz. Then judge your role against the coverage. A guard dying on a screen in drop forces the big into impossible two-on-one situations. A big backpedaling too deep in drop hands up rhythm pull-ups. A switch called too late creates slips and confusion. These are not vague defensive issues. They are specific communication and footwork errors that film can isolate possession by possession.
| Defensive area | What to track on film | Common cause | Practical fix |
|---|---|---|---|
| Transition defense | First three steps, paint touch, matchups found | Ball watching after shots or turnovers | Sprint-to-paint rule and verbal matchup call |
| On-ball containment | Drive direction, chest angle, fouls | Opening hips too early | Mirror slides and cut-off step drill |
| Help defense | Tag timing, nail position, stunt and recover | Standing too flat to ball and man | Shell drill with freeze corrections |
| Screen navigation | Contact point, route, rear contest | Late communication or poor body angle | Live pick-and-roll reads against set coverages |
| Defensive rebounding | Hit, locate, pursue rate | Watching the flight before contact | Hit-first rebounding sequence |
Defensive analytics should stay simple enough to trust. Start with blow-bys allowed, screen navigation losses, missed tags, fouls by type, defensive rebound percentage, and points allowed in transition when you are on the floor. If you play organized team basketball, plus-minus can add context, but use it carefully because lineup quality affects it heavily. For self-diagnosis, event counts from film are usually more actionable than broad summary numbers. You do not improve defense by staring at a rating. You improve it by correcting the recurring actions that create that rating.
Turn observations into drills, benchmarks, and weekly improvement
Film study only matters if it changes what you do next. After every review session, write one priority skill, one priority decision habit, and one priority defensive habit. Keep the list short. A player trying to fix six things at once usually fixes nothing. If video shows that your catch-and-shoot misses come from late preparation, your drill block should begin with pre-catch footwork from multiple pass angles, not random volume shooting. If your turnovers come on jump passes, build constraints into live drills where leaving your feet to pass ends the rep.
Use benchmarks that connect directly to game actions. Examples include release time under .7 seconds on stationary catches, two-dribble paint touch creation against guided pressure, fewer than two live-ball turnovers per scrimmage, or ninety percent correct low-man rotations during tagged possessions. These are not arbitrary. They convert film findings into testable standards. I prefer weekly comparison, not daily judgment, because basketball performance varies with fatigue and competition level. Review enough clips to see a real trend before declaring success or failure.
A good weekly workflow is straightforward. Film one workout and one live session. Tag only the possessions connected to your current priorities. Review them within twenty-four hours while details are fresh. Pull three clips that show the mistake, three that show improvement, and one model clip from a high-level player who solves the problem well. Then design the next week of work around those examples. This is where internal training resources fit naturally: a shooting mechanics breakdown, a pick-and-roll reads guide, a closeout defense article, or a finishing footwork plan can each support the specific issue film uncovered.
Finally, be honest about limitations. Video quality can hide details. Small sample sizes can mislead. Solo review can miss scheme context that a coach would catch immediately. Analytics can also create false confidence if you track easy numbers and ignore hard truths. The answer is not to abandon film. It is to pair footage with context, use consistent definitions, and review enough possessions to identify stable habits. Done well, video turns basketball training into a feedback loop you control. Start filming, tag your next ten key possessions, and let the evidence show you exactly what to fix.
Using video to diagnose and fix your own basketball game is powerful because it connects truth, action, and measurable progress. Film shows what happened. Analytics explains how often it happened and how much it mattered. Together, they replace guessing with evidence. That shift is the real advantage. Players improve faster when they stop relying on memory, emotion, or one great highlight and start studying complete possessions with objective criteria.
The most important takeaway is that self-scouting must be structured. Record workouts, small-sided play, and full games. Review with defined categories. Separate symptoms from causes. Tag clips in a consistent way. Track a few metrics that matter to possession value, shot quality, and defensive reliability. Then translate the biggest patterns into drills and weekly benchmarks. This process works for a youth guard trying to tighten handles, a high school wing cleaning up closeouts, or an adult player building a more efficient scoring profile.
It also helps you train the right thing at the right time. If film shows your jumper breaks down after hard movement, you need movement shooting and conditioning integration, not just spot-up makes. If clips show late help rotations, the answer is not generic defensive effort; it is earlier positioning, clearer communication, and repeated shell work. Precision saves time. Over a season, that matters as much as effort.
As the hub for film and analytics within basketball training, this page gives you the framework to evaluate shooting, decision making, defense, and progress over time. The next step is simple: film your next session, chart ten meaningful possessions, and identify one offensive and one defensive habit to improve this week. If you do that consistently, your game will stop feeling random and start becoming coachable by you.
Frequently Asked Questions
1. Why is video such an effective tool for diagnosing problems in your basketball game?
Video is effective because it replaces guesswork with proof. A lot of players rely on feel alone, and feel can be misleading. You may think your shot is off because of your release, when the real issue is your footwork, balance, or shot preparation before the ball even reaches your hands. You may believe your drives are getting cut off because defenders are faster, when the film shows you are attacking too upright, exposing the ball, or missing an open first step angle. Video lets you slow the game down and see exactly what happened instead of what you remember happening.
It also helps you identify repeated patterns, which is where real improvement starts. One missed shot does not tell you much, but if film shows that you consistently fade left on pull-ups, dip the ball too low on catches, or arrive late on closeouts from the weak side, those are actionable habits you can fix. That is where analytics becomes valuable. Once you review enough clips, you can track measurable tendencies such as where your shots come from, how often you finish going right versus left, how many turnovers happen under pressure, or how often you lose vision of both your man and the ball on defense. The combination of visual evidence and measurable trends gives you a much clearer roadmap for training.
Just as important, video creates accountability. It is hard to ignore a flaw when you can see it over and over on screen. That makes practice more efficient because you stop working on everything and start working on the few things that matter most. Instead of saying, “I need to get better,” you can say, “I need to widen my base on catch-and-shoot jumpers,” or “I need to tag the roller earlier in pick-and-roll defense.” That level of precision is why video is one of the fastest ways to diagnose and fix your own basketball game.
2. What should you record if you want to use film to improve as a basketball player?
You should record more than just your highlights. To get useful feedback, film real possessions, full-speed drills, scrimmages, and game action whenever possible. Highlights are good for confidence, but they hide the mistakes that actually need attention. The most valuable footage includes made and missed shots, turnovers, defensive possessions, transition sequences, and moments where you were off the ball. A complete picture of your game is far more useful than a collection of your best plays.
Start by capturing three main areas: shooting, decision-making, and defense. For shooting, record catch-and-shoot reps, off-the-dribble shots, free throws, and game-speed attempts from different spots. Look at your base, balance, hand placement, release timing, follow-through, and whether your mechanics stay consistent when you are tired or under pressure. For decision-making, record live play situations such as pick-and-rolls, drives, kick-outs, and fast breaks. Pay attention to whether you are seeing the floor early, making the right read, forcing contested shots, or missing open teammates. For defense, record possessions where you guard the ball, help off the ball, recover to shooters, box out, and communicate during rotations.
Camera angle matters too. A sideline angle is useful for studying spacing, movement, and on-ball actions. A baseline angle can help you evaluate shooting alignment, finishing angles, and defensive positioning around the rim. If possible, use both over time. You do not need professional equipment. A phone on a tripod is enough if the image is stable and wide enough to show the full action. The goal is not perfect production quality. The goal is clear footage that helps you spot habits, trends, and breakdowns you can actually correct in training.
3. How do you break down basketball film without getting overwhelmed?
The best way is to review your film with a narrow focus. Do not try to fix your entire game in one session. Pick one category at a time, such as jump shooting, finishing, ball handling under pressure, pick-and-roll reads, on-ball defense, help defense, or rebounding positioning. Once you choose a category, watch multiple clips and ask the same few questions every time. For example, on jump shots, you might ask: Was I balanced? Were my feet set early? Did I hop or drift unnecessarily? Did I shoot on time? On drives, you might ask: Did I beat my defender with pace and angle? Did I attack a gap decisively? Did I keep my eyes up? Did I make the right read at the rim?
It helps to divide each play into phases. Look at what happened before the action, during the action, and after the action. Many mistakes start early. A rushed shot often begins with poor preparation on the catch. A turnover on a drive may begin with bad spacing or a late first move. A defensive breakdown can start because you were standing too upright or ball-watching before the screen even came. By breaking the play into stages, you stop reacting only to the final result and start seeing the true cause.
Keep notes as you watch. Write down repeated issues, not random mistakes. If a problem shows up once, note it and move on. If it shows up five or ten times, it belongs in your training plan. You can even use a simple chart with headings like “Shot Mechanics,” “Decision-Making,” “Defense,” and “Transition.” Under each heading, list trends such as “base too narrow,” “late weak-side help,” or “misses skip pass when help rotates.” This process keeps film study organized and useful. The point is not to criticize yourself endlessly. The point is to identify a few high-impact patterns you can train with purpose.
4. What kinds of basketball analytics can you track from video to improve faster?
You do not need advanced software to use analytics effectively. Start with simple, meaningful numbers pulled directly from your footage. Shot location is one of the most valuable metrics. Track where your attempts come from: at the rim, short mid-range, long mid-range, corner three, above-the-break three, free throws, and pull-up versus catch-and-shoot opportunities. This tells you whether you are getting quality looks or settling for difficult ones. It also helps you see where you are most efficient and where you may need more reps or better shot selection.
You can also track decision-making outcomes. Count assists, turnovers, forced shots, missed passing reads, and possessions where you made the correct basketball play even if the shot did not go in. This gives you a better understanding of your offensive value beyond scoring. For drivers and guards, it is helpful to log how often you finish through contact, how often you get cut off, which hand you use at the rim, and whether help defenders are beating you to spots because of your pace or angle. For wings and forwards, it may be more useful to track cuts, catch-and-shoot timing, offensive rebounds, or how often you relocate properly after making a pass.
On defense, useful analytics include blow-bys allowed, successful contests, missed box-outs, lost assignments, late rotations, deflections, and how often you provide help without giving up easy recovery opportunities. Even simple percentages can be powerful. If film shows you make strong closeouts in only half of your opportunities or lose track of your man three times per quarter, that is information you can train against. The purpose of analytics is not to turn basketball into a spreadsheet. It is to make your improvement measurable. Once you can quantify a habit, you can monitor whether your training is actually changing it.
5. How do you turn what you see on film into a practical training plan that fixes your game?
The key is to move from observation to action. After reviewing your footage, identify the two or three issues that appear most often and have the biggest impact on performance. Do not chase ten different fixes at once. If your film shows that you rush catch-and-shoot jumpers, struggle to finish through help on drives, and arrive late on defensive rotations, those become your priorities. Each issue should then be translated into a specific training objective. “Shoot better” is too vague. “Land balanced with shot-ready feet before the catch” is specific. “Finish better” is too broad. “Attack the defender’s outside hip and finish with controlled footwork through contact” is trainable.
Once you know the priorities, build drills that match the exact problem. If your shot balance breaks down, use game-speed catch-and-shoot reps with emphasis on foot preparation, stopping under control, and holding your finish. If your drives are getting stopped, practice reads off the first defender and second defender, including euro steps, floaters, stride stops, and kick-out passes depending on help position. If your defensive film shows late help and poor recoveries, run shell drills, closeout drills, and live rotation work where you must see both ball and man while making fast decisions. The closer the drill matches what the film exposed, the faster the improvement tends to show up in games.
Finally, test your progress by filming again. This step is essential. A training plan is only working if the corrected habit appears on new film. Re-record similar situations every one to two weeks and compare the results. Are you getting to your spots sooner? Is your base more consistent? Are your reads cleaner? Are you rotating earlier on defense? This