
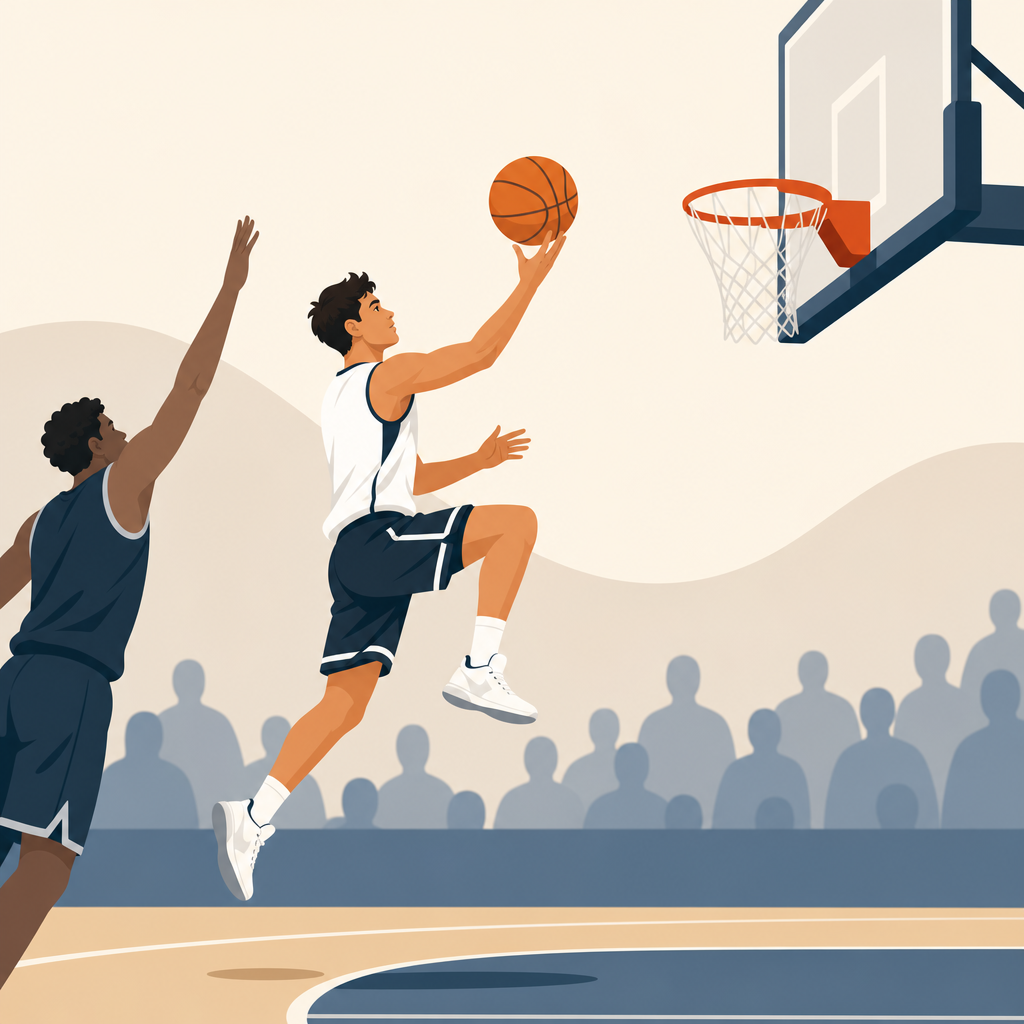
The floater is one of basketball’s most underrated offensive moves because it solves a problem every scorer faces: how to finish in the space between a rim protector and the basket without forcing a layup, charging into contact, or settling for a low-value midrange jumper. In simple terms, a floater is a soft, high-arcing shot released on the move, usually from roughly 5 to 12 feet, designed to go over help defenders before they can block or alter it. I have taught and drilled this shot with youth guards, high school wings, and adult rec players, and the pattern is always the same: once a player learns when to use a floater, driving efficiency rises immediately because defenders can no longer sit on the rim or overplay the kick-out pass.
As a Basketball Skills hub page focused on offense, this article covers more than just shooting form. It explains what a floater is, why it matters in modern offensive systems, how to execute it step by step, when to choose it over a layup or pull-up, and how to practice it until it holds up in games. It also connects the floater to core offensive concepts such as paint touches, pick-and-roll reads, drop coverage, help defense, spacing, and touch finishes. If you are building a complete offensive package, the floater sits right between ball handling, finishing, shot creation, and decision-making. Master it, and every drive becomes harder to guard.
The move matters because defensive schemes increasingly funnel ball handlers into contested interior space. Bigs play drop coverage, weak-side shot blockers rotate early, and strong defenders recover from the hip to remove direct layup angles. That means many drives end in the “gray area,” the lane pocket where a player is too deep for a comfortable pull-up but too far or too crowded for a clean layup. Elite guards have answered that problem for years. Tony Parker made the runner famous in traffic, Mike Conley used it to score over length, Trae Young weaponized it from pick-and-roll, and countless international guards rely on it because it punishes conservative rim protection. For developing players, the floater is not a trick shot. It is a practical offensive answer.
Understanding that offensive value is the first step. A good floater expands your finishing map, keeps defenders guessing, and creates passing opportunities because help defenders must honor your release point earlier than they would against a pure rim attack. It also lowers the number of reckless attempts at the rim, which can cut down blocked shots and offensive fouls. The key is to treat the floater as a skill built on footwork, balance, touch, and read-based timing rather than desperation. Once players see it that way, they stop flipping the ball wildly and start shooting a repeatable, controlled scoring shot.
What a floater does for an offense
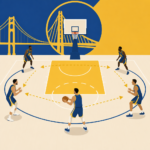
A floater is valuable because it attacks the soft spot of most half-court defenses. In a standard pick-and-roll, if the on-ball defender trails and the screener’s defender drops toward the restricted area, the ball handler often reaches the dotted line with a decision to make. A layup invites the shot blocker. A pull-up may be rushed by rear pressure. The floater splits that difference by using quick release, arc, and touch. From an offensive standpoint, that means the move turns “almost good” drives into efficient possessions.
It also improves spacing without changing where teammates stand. When a guard can score with a floater, the low man cannot simply plant at the rim and wait. He has to step up, and that opens dump-offs, corner skips, and offensive rebounding lanes. Coaches often talk about paint touches creating rotation. A floater gives those touches teeth. Defenses that happily concede crowded lane space begin to collapse earlier, and once they do, your reads get cleaner. That is why the floater belongs in any serious conversation about basketball offense, not only individual scoring.
For undersized players, the move is even more important. A six-foot guard attacking a six-ten center needs counters that do not depend on vertical explosion. The floater reduces the need to finish through square chest-to-chest contact at the rim. Bigger wings benefit too, especially when help rotates from the dunker spot or nail. In transition, in secondary break situations, and out of spread pick-and-roll, the floater can be the fastest clean shot available. It is not a substitute for layups or pull-up jumpers; it is the bridge that makes both more dangerous.
How to shoot a floater with proper mechanics
The best floater mechanics start with controlled pace. Most players miss this shot because they arrive too fast and try to save the possession with their hand instead of preparing with their feet. Enter the lane under control, keep your chest slightly upright, and gather the ball high enough that you can release before a contest reaches it. Your eyes should find the target early. I teach players to pick a soft visual target above the front of the rim or just over the center depending on angle, because “aiming at the basket” is too vague for a touch shot.
Footwork determines consistency. The common pattern for a right-handed floater is left-right gather into a one-foot takeoff off the left foot, though two-foot floaters and opposite-foot finishes also matter. As you plant, stay tall enough to see over traffic but not so upright that you lose power. Your shooting elbow should stay under or slightly inside the ball, and the off-hand must come off cleanly. The release is more of a push-shot than a full jump shot, but it still needs wrist control. The ball should leave your fingertips softly with backspin and enough arc to clear the contest.
One mistake I correct constantly is players flinging the ball from their shoulder with no lower-body timing. A reliable floater uses coordinated force from the plant foot, knee drive, core stability, and shooting hand extension. Another mistake is drifting sideways to avoid contact. Slight angle changes are fine, but uncontrolled fade kills touch. Think “up and over,” not “away and across.” If you are shooting from 6 to 10 feet, the ball should rise high enough that a late contest has little effect. If the shot comes out flat, it becomes an easy rebound or block.
Hand placement and ball path matter too. Keep the ball protected during the gather, especially against rear contests. Many guards bring the ball low, exposing it to strips from trailing defenders. Instead, gather near the chest or shoulder pocket and move directly into the release. On same-hand, same-foot floaters, often used to freeze shot blockers, the motion is quicker and less traditional, but the principles are the same: balance, early vision, soft touch, and a predictable arc. Before adding advanced variations, players should own the basic one-foot floater from both sides of the lane.
When to use a floater instead of other finishes
Good offense is not about having every move. It is about selecting the right move at the right moment. Use a floater when the primary rim protector is backpedaling or waiting near the restricted area, when a help defender is outside charge position but inside your layup path, or when rear pressure makes a normal jump stop difficult. It is especially effective against drop coverage, late low-man rotations, and bigs who prefer vertical contests over stepping up. In those situations, a floater punishes passive rim protection.
Do not force the shot when a layup is open. If you have the defender on your hip and a clean angle to the glass, finish at the rim. Likewise, if the big steps up early and opens a pocket pass or lob, make the pass. The floater is strongest as a read, not a habit. Many young guards fall in love with it and start avoiding contact even when they have an advantage. That hurts offensive efficiency. The goal is to add the floater to your toolbox so defenders must guard more options, not so you replace simpler, higher-percentage shots.
| Game situation | Best offensive choice | Why it works |
|---|---|---|
| Trailing defender on your hip, big in drop at dotted line | Floater | Quick high release beats rear pressure and avoids shot blocker |
| Clear lane with inside angle to rim | Layup | Closest, highest-percentage finish |
| Big steps up above foul line, roller open behind him | Pocket pass or lob | Help committed early, passing window is exposed |
| Defender goes under and recovers late | Pull-up jumper | Space is available before interior help arrives |
| Weak-side shot blocker rotates from corner to front of rim | Floater or dump-off | Rim is crowded, but middle space remains available |
Reading the floor early is what separates a good floater from a bailout toss. Train yourself to identify the big’s feet, not just his hands. If he is flat-footed or retreating, the floater window is there. If he is charging forward, the shot may need more height, a side step, or a pass. Also note the defender behind you. A floater works well when that defender is attached and discouraging a normal pull-up. The more clearly you understand those cues, the more the floater becomes a deliberate offensive weapon instead of a low-control improvisation.
Floater footwork, angles, and release variations
There is not just one floater. The standard one-foot runner is the foundation, but game situations require variations. The classic right-hand version off the left foot is ideal moving from the middle or right lane line because it keeps the ball away from the body of the trailing defender and gives natural lift. From the left side, some players still use the right hand for touch, while others prefer a left-hand floater to keep the shot farther from a shot blocker. Both are useful if practiced correctly.
Two-foot floaters are common when the defense cuts off downhill momentum. A jump stop near the dotted line can freeze a big, allowing a balanced release before contact. This version is often easier for stronger players who prefer stability over speed. Same-foot, same-hand floaters are more advanced, but they are excellent counters in tight windows because they disrupt defender timing. Steve Nash and other crafty guards used these awkward rhythms to great effect. The move looks unusual, but it creates separation because help defenders expect conventional steps.
Angle changes matter as much as footwork. A straight-line floater is easiest to block if the big is centered. By veering slightly off the defender’s outside hip, you change the contest angle and expose more glass and rim. I often teach players to “win the shoulder” before releasing. Once your torso is slightly past the primary defender, the shot blocker has to contest across your body instead of directly through the ball. That tiny positional edge often decides whether the floater is soft and clean or heavily altered.
Release height should match distance. Closer floaters need touch and arc, not force. Deeper runners from 10 to 12 feet require more leg drive and a firmer wrist finish. If every floater uses the same speed, short shots fly long and long shots die short. Great touch shooters naturally scale the energy. Developing players should exaggerate that awareness in drills by working from marked spots: lane line, middle, dotted line, and just inside the foul line. When you can feel the difference in force while preserving the same ball flight shape, your percentage climbs fast.
How to practice floaters so they work in games
Floater development should move from technique to pressure, not the other way around. Start with stationary touch work close to the rim using one hand. Focus on arc, soft backspin, and landing under control. Then progress to one-step and two-step runners from both lane lines. Early makes matter because they build a visual model of the correct trajectory. Ten lazy reps teach very little; fifty focused reps with consistent footwork teach plenty. I prefer short, frequent sets over marathon sessions because touch work declines when the legs are fatigued.
Next, add realistic entries. Use a cone or chair as the screen defender and attack off a dribble from the wing, slot, and top. Practice reading the cone as if it were a dropping big. One rep should end with a floater, the next with a layup, the next with a pocket-pass fake into a shot. This keeps the drill decision-based. Pure repetition is useful for mechanics, but offense lives in reads. If every practice floater comes from an obvious setup with no variation, players struggle to find the shot under game speed.
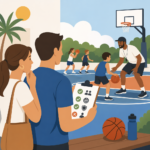
Then add guided defense. A coach or teammate can trail from behind with a pad while another defender stands near the rim showing hands without fully blocking. This teaches timing and release height. Track results by spot and type: right hand off left foot, left hand off right foot, two-foot middle, and so on. Over time, patterns appear. Most players have one side where the ball leaks flat or one distance where touch falls off. Film helps. Slow-motion review often reveals that misses are caused less by the hand and more by rushed steps, low gathers, or drifting shoulders.
Finally, test the shot in small-sided games. Three-on-three in the half court is ideal because the paint is still occupied but reads are frequent. Score floaters as bonus points during practice to encourage recognition, then remove the bonus once players start seeing the window naturally. The goal is not to hunt floaters every possession. The goal is to punish the exact defensive coverage that gives them up. When that habit forms, the skill carries directly into competitive games.
Common mistakes and how offensive players fix them
The most common floater mistake is using it as a bailout after losing balance. Players drive too deep, jump with no plan, and toss the ball with little arc. The fix is early decision-making. Know by the free-throw line or first paint touch whether the big is available for a layup contest. A second problem is shooting too flat. That usually comes from releasing across the face, pushing from the palm, or failing to lift off the plant foot. Rehearsing a higher finish and aiming above the front rim usually solves it.
Another mistake is practicing floaters only with the dominant hand. In games, the defense rarely lets you choose perfect angles. A complete offensive player can at least threaten the shot from either side of the floor. Players also neglect pace. The floater is not always fast. Sometimes the best setup is a hesitation that freezes the big, followed by one controlled step into the release. Change of speed often creates more space than pure speed. Last, many players never connect the shot to broader offensive reads. The floater works best when paired with strong handles, credible pull-ups, rim finishes, and passing vision. Build it as part of your offense, then get in the gym and own it.
Frequently Asked Questions
What is a floater in basketball, and why is it such an underrated offensive move?
A floater is a soft, high-arcing shot taken on the move, usually from about 5 to 12 feet, and most often used when a player gets into the lane but does not have a clean path all the way to the rim. Instead of forcing a layup into a shot blocker, jumping into a charge, or pulling up for a tougher midrange jumper, the scorer releases the ball early with touch so it rises over help defense and drops in before the rim protector can recover. That is exactly why the floater is so effective and so often overlooked: it solves one of the hardest problems in basketball, which is finishing in the space between the primary defender and the big waiting at the basket.
What makes the floater underrated is that it is not always flashy, but it is incredibly practical. Defenses are built to take away layups and threes, and the floater punishes that strategy by exploiting the area they are willing to give up. For guards, wings, and even undersized finishers, it becomes a counter that keeps defenders honest. Once a player can threaten a floater, help defenders cannot simply sit at the rim, and on-ball defenders cannot chase quite as aggressively from behind. That opens up cleaner driving angles, easier drop-off passes, and more efficient paint touches. In other words, the floater is not just a shot; it is a tactical weapon that changes how the defense has to guard the entire possession.
When should you shoot a floater instead of a layup, pull-up jumper, or pass?
You should shoot a floater when you beat your initial defender, enter the lane, and see the rim protector positioned in a way that makes a full layup attempt risky. If the big is waiting near the restricted area, stepping up late from the dunker spot, or rotating across the lane, the floater is often the right choice because it allows you to score before getting too deep. It is especially useful when there is enough space to get the shot off but not enough space to extend fully to the rim. A good floater is released earlier than a layup, which is what makes it so difficult to block.
It is usually a better option than a pull-up jumper when you are already moving downhill and have created an advantage inside the paint. Stopping for a midrange shot can give trailing defenders time to contest and help defenders time to recover. The floater preserves your momentum while still giving you touch and control. At the same time, you should not force it if a defender commits so aggressively that a dump-off pass, lob, or kick-out is clearly available. The best scorers read the help: if the big stays back, finish or shoot the floater; if the big steps up too high, pass behind him; if the lane opens completely, take the layup. The floater is most effective when it is used as a read, not as an automatic decision every time you enter the paint.
What are the key mechanics for shooting a floater correctly?
The foundation of a good floater is balance, touch, and timing. Start by attacking under control, because a floater is not just a wild toss toward the rim. As you get into your shooting window, keep your eyes up and your body centered. Most players use either a one-foot floater or a two-foot floater depending on speed, angle, and defensive pressure. A one-foot floater is common when driving with momentum and can be released quickly, often off the same-side or opposite-side foot depending on the situation. A two-foot floater is more controlled and can help when navigating traffic or decelerating in a crowd.
The ball should come up smoothly and stay protected until the release. Avoid dropping it low where guards can swipe or bigs can time your motion. At release, think soft wrist, high touch, and upward energy rather than a hard line drive. The shot needs arc so it gets over the contest, but it also needs feel so it lands softly on the rim or backboard. Your guide hand should stay quiet, your shooting hand should finish naturally, and your body should remain composed rather than fading wildly unless the angle demands it. Most missed floaters come from one of three errors: shooting too hard, releasing too late, or drifting off balance. If your mechanics are clean, the floater becomes far more repeatable and much easier to trust in game situations.
How can you practice and improve your floater consistently?
The best way to improve your floater is to train it with structure, repetition, and game-like footwork. Start close to the basket so you can build touch first. Practice from 5 to 8 feet using both hands if possible, and aim for a soft, high arc. Then gradually move out to 10 to 12 feet while maintaining the same feel. One of the biggest mistakes players make is trying to master floaters at full speed before they have touch. You want to own the release first, then add movement, then add defenders and reads.
From there, build your drill progression. Work on one-foot floaters off right-hand drives and left-hand drives. Then work on two-foot floaters in the middle of the lane. Add cones or chairs to simulate help defenders so you learn where your pickup point should be. Practice different angles, including from the slot, wing, and baseline side. It is also important to train decision-making: take two dribbles into the paint, read an imaginary shot blocker, and decide whether the rep is a floater, finish, or pass. If you really want the shot to carry over into games, track makes from realistic spots and demand quality. For example, set goals for makes from each lane line, middle lane area, and short paint windows. Consistent floater development comes from repeating the exact footwork, release, and read you expect to use under pressure.
Can smaller guards and youth players use the floater effectively, or is it mainly for advanced scorers?
Smaller guards and youth players can absolutely use the floater effectively, and in many cases they benefit from it even more than taller players. When you are giving up size at the rim, you need an answer before the shot blocker gets to your body or to the ball. That is exactly what the floater provides. It allows younger or smaller players to score in the paint without always needing to absorb heavy contact or finish directly through length. For that reason alone, it is one of the smartest shots for developing guards to learn as their handle and paint reads improve.
That said, the floater should be taught progressively. Younger players should first learn pace, balance, and touch around the basket before they start launching rushed runners from random spots. Once they can finish basic layups and stop under control in the lane, the floater becomes a natural next step. It does not require elite athleticism, but it does require discipline and repetition. Advanced scorers may use it more creatively, with different release points, wrong-foot timing, or counters off ball screens, but the core shot itself is very teachable. In fact, teaching the floater early can help players become more complete offensive threats because it trains them to read help defense, control speed in the paint, and score with finesse instead of relying only on speed or strength.