
Basketball rim height by age matters because the right hoop setup shapes shooting mechanics, confidence, safety, and long-term enjoyment of the game. Parents often ask when kids should move up to 10 feet, but age alone is not the best guide. A better answer combines age, physical development, strength, coordination, league rules, and the purpose of each session. In practical terms, hoop height is the measurement from the playing surface to the top of the rim, and the regulation standard for most high school, college, international, and professional play is 10 feet. Youth basketball uses lower heights at earlier stages so players can build correct form instead of heaving the ball with poor mechanics.
I have worked with youth players, adjustable systems, and home-court setups long enough to see the same pattern repeatedly: if the rim is too high too early, kids flatten their shot, push from the chest, and lose touch around the basket. If the rim stays too low for too long, they can dominate a lowered goal but struggle when the game demands arc, leg drive, and release timing on regulation equipment. The goal is not to chase a birthday milestone. The goal is to create a clean progression from beginner-friendly hoops to a regulation 10-foot basket without sacrificing technique.
This guide serves as a hub for hoops and gear decisions within basketball equipment. It covers common rim-height recommendations by age, how leagues handle transitions, what signs show a player is ready for 10 feet, and how backboard size, basketball size, adjustability, and installation affect the decision. It also answers a question families rarely ask soon enough: should practice always happen on the same height used in games? Not necessarily. Smart training often uses multiple heights for finishing, confidence work, and mechanics. By the end, you will know how to choose the right height now, when to move up, and what equipment features matter most.
Recommended basketball rim height by age
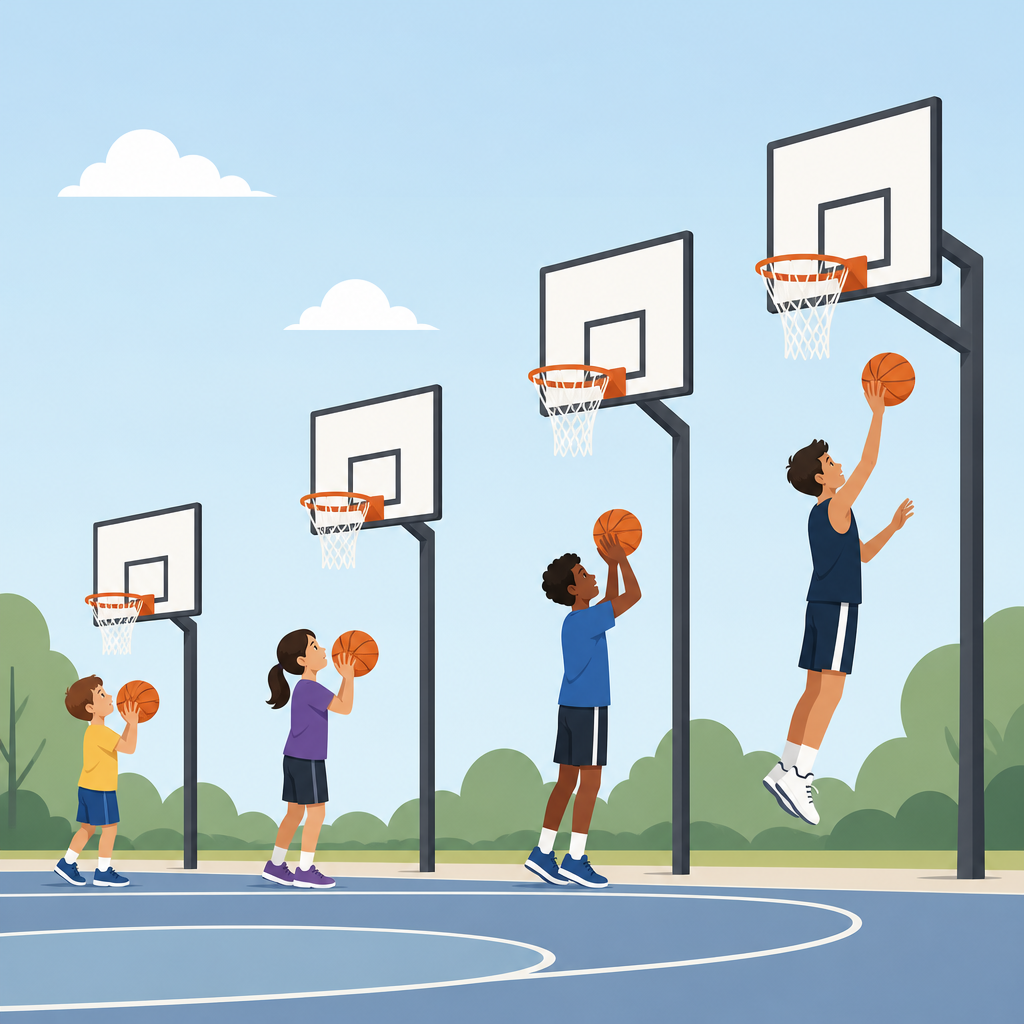
The most useful basketball rim height by age framework starts with developmental ranges, not rigid cutoffs. For very young beginners, ages 5 to 7, a hoop around 6 to 7 feet is usually appropriate. At this stage, children are learning stance, hand placement, aiming, and simple layup footwork. Asking them to score consistently on 10 feet usually produces two-handed pushes and low, line-drive shots. Ages 8 to 10 often fit well on 7 to 8 feet, sometimes 8.5 feet for stronger or more experienced players. Ages 11 to 12 commonly transition toward 9 feet, with many leagues using that height to bridge the gap before full regulation. By ages 13 and up, most competitive players should be preparing for or already using 10 feet, especially if their league games are played there.
These ranges align with broad youth-development standards used by community programs, training academies, and manufacturers of adjustable hoops, though local rules differ. USA Basketball and other development-focused organizations have emphasized age-appropriate equipment for years because scaled environments improve skill acquisition. The principle is simple: a child should be able to shoot with a coordinated chain from legs to core to shoulders to wrists. The rim height should support that chain. If the child cannot get the ball to the basket with arc while maintaining balance and follow-through, the environment is too demanding.
Parents should treat age-based recommendations as a starting point, not a verdict. A tall, strong, skilled 10-year-old who plays year-round may be ready for 9 feet, while a new 12-year-old player might still benefit from 8.5 feet in some training blocks. The best youth coaches I know care less about age labels and more about movement quality. They watch whether the player can shoot from realistic spots without twisting, fading backward, or launching from the hip. That observation matters more than any chart.
When kids should move up to a 10-foot hoop
Kids should move up to a 10-foot hoop when they can demonstrate repeatable shooting mechanics, enough strength to create arc without strain, and game readiness for the level they are entering. For many players, that happens between ages 11 and 14. The right time is usually earlier for highly active travel players and later for beginners. If a child’s league uses 10 feet, regular practice on 10 feet becomes necessary. Still, moving up does not mean abandoning lower rims completely. I often keep younger players on a mixed plan: regulation height for game shots and a lower setting for form shooting, floaters, and finishing creativity.
Several clear signs indicate readiness. First, the player can shoot a standard youth ball with one fluid motion rather than a chest push. Second, the ball reaches the rim from appropriate game distances with visible arc. Third, misses are mostly directional or touch-related, not short because of lack of strength. Fourth, the player can make layups and short jumpers on 10 feet without changing footwork or leaning dramatically. Fifth, the player wants the challenge and does not lose confidence after normal misses. Confidence matters because a technically ready player can still regress if every session feels like failure.
The biggest mistake is using only age as the trigger. A smaller child turning 11 is not automatically ready. A strong 10-year-old might be. Another mistake is moving up too late because a lower hoop inflates scoring. Temporary success on an 8-foot rim can hide mechanical issues that appear immediately on 10 feet. Families should think in phases: expose the player to 10 feet early, increase volume gradually, and make the full switch when mechanics hold up under fatigue and game speed.
League rules, training goals, and why context matters
Game environment should heavily influence hoop choice. If your child plays in a recreation league that uses 8 feet for third and fourth grade, practicing only on 10 feet can be frustrating and unnecessary. If the middle school, club, or school feeder program uses 10 feet, then delaying exposure creates a different problem: the player arrives underprepared. In real gym settings, I have seen players dominate a lowered driveway hoop and then freeze in tryouts because every jumper on regulation rims falls short.
Training goals also change the answer. If the goal is basic enjoyment, social play, and confidence, a slightly lower hoop often keeps kids engaged. If the goal is technical development for competitive basketball, the setup should progressively match regulation demands. Many skill trainers use variable-height sessions for this reason. A player might start with one-hand form shooting on 8.5 or 9 feet, then move to 10 feet for free throws, elbows, and wings. That approach preserves mechanics while building strength in context.
Surface and space matter too. A portable hoop on a short driveway with limited run-up changes how kids approach shots and layups. A full half-court with painted lines and enough depth behind the backboard supports more realistic reps. Equipment decisions never happen in isolation. Rim height, ball size, backboard width, court space, and the player’s current league should be evaluated together.
How ball size, backboard, and hoop design affect rim-height decisions
Rim height is only one part of the equipment equation. Basketball size changes how demanding any height feels. A smaller youth ball lets younger players learn rotation and touch; an oversized ball forces compensation. Standard progression usually looks like a size 3 or 4 for very young children, size 5 for many ages 9 to 11, size 6 for most girls and many boys ages 12 to 14 depending on league, and size 7 for boys in standard men’s play. If a child is struggling on 10 feet, the issue may be the ball, not the rim.
Backboard dimensions and material also matter. Regulation backboards are 72 inches wide, but many home systems use 44-, 48-, 54-, or 60-inch backboards. A smaller backboard reduces bank-shot space and can make finishing drills less forgiving. Material affects rebound response. Polycarbonate is durable and common on family hoops, acrylic gives a more responsive feel, and tempered glass is closest to gym performance. Pole offset, overhang, and base stability influence safety and usability. A hoop that shakes excessively after every shot can disrupt touch work and discourage repetition.
| Player stage | Typical rim height | Common ball size | Useful backboard range | Primary goal |
|---|---|---|---|---|
| Ages 5–7 beginner | 6–7 feet | 3 or 4 | 44–48 inches | Fun, coordination, basic form |
| Ages 8–10 developing | 7–8.5 feet | 5 | 48–54 inches | Arc, layups, simple game shots |
| Ages 11–12 transition | 8.5–9.5 feet | 5 or 6 | 54–60 inches | Strength transfer, realistic spacing |
| Ages 13+ competitive | 10 feet | 6 or 7 | 60–72 inches | Regulation play and advanced reps |
Adjustable systems are the best solution for most families because they allow progression without replacing the hoop. Look for a model with a clear height scale, easy crank or handle operation, and a range that drops low enough for younger siblings. In equipment planning, adjustability delivers more value than buying a fixed 10-foot goal too early.
Common mistakes parents make with youth hoops and gear
The first mistake is prioritizing what looks official over what helps development. A 10-foot rim with a large backboard may seem like the serious choice, but serious development starts with equipment the player can actually use well. The second mistake is ignoring shot mechanics. When a child repeatedly launches from the waist, rotates sideways, or lands far forward just to reach the rim, the setup is teaching survival, not skill.
The third mistake is forgetting that growth is uneven. Kids gain height, coordination, and strength at different rates. A hoop height that worked in spring may be too easy by winter, or a recent growth spurt may temporarily disrupt timing and require more form work. The fourth mistake is buying the wrong type of system. Portable hoops are practical, but cheaper models often have weak bases, narrow backboards, and excessive vibration. In-ground systems cost more and require installation, yet they usually provide better stability, safer play under the rim, and a truer rebound.
Another frequent issue is poor environment design. Families invest in a hoop but not in useful accessories such as a pump, net replacements, court tape, ball rack, or outdoor balls matched to the surface. The result is scattered practice and rapid wear. A strong hoops-and-gear setup does not need to be extravagant. It needs to be coherent. Rim height, ball size, rebound quality, available space, and training intent should all support the same stage of development.
How to build a smart progression at home
A practical home progression starts by setting the hoop where the child can shoot with arc and balanced form from close range. Use that as the baseline, then raise the rim in small increments over time. Many adjustable hoops move in 6-inch steps, which is ideal. I recommend evaluating every six to eight weeks during active seasons. Watch ten to twenty shots from common spots: right layup, left layup, front-of-rim form shot, free-throw area scaled to age, and short corner. If mechanics stay intact and the player is clearly overpowering the current height, move up one setting.
Blend skill work across heights when useful. For example, a 10-year-old might do finishing and touch drills on 8 feet, then spend the final ten minutes on 8.5 or 9 feet for game-style jumpers. A 12-year-old preparing for school ball may complete almost everything on 10 feet but use 9 feet once a week for high-volume form restoration. This is not “making it easier.” It is constrained training, the same logic used in many skill-development systems to isolate mechanics before returning to full demands.
Track results simply. Note make percentage on layups, short jumpers, and free throws, but also note shot shape and body control. Improvement is not just more makes. It is higher arc, cleaner release, fewer compensations, and better confidence. Those markers tell you when the player is truly ready to move up to a 10-foot hoop and stay there.
Choosing the right hoop within a basketball equipment hub
As the hub page for hoops and gear, this topic should guide families toward a complete buying framework. Start with usage: driveway recreation, serious youth training, multi-child family use, or school-team preparation. Then evaluate installation type, backboard size, material, adjustability, weather resistance, and warranty support. Brands such as Goalrilla, Lifetime, Spalding, Silverback, and First Team cover different budgets and performance levels. No single brand is best for every family. The right choice depends on whether you value portability, rebound authenticity, low maintenance, or long-term upgrade flexibility.
If one takeaway matters most, it is this: kids should move to 10 feet when their mechanics and game context support it, not simply when they reach a certain birthday. Use age as a reference, not a rule. Pair the right rim height with the right ball, backboard, and training plan. That combination helps young players develop touch, confidence, and transferable skill instead of compensations that are hard to fix later.
For your next step, assess your current hoop setup honestly. Measure the rim, check the ball size, watch a short shooting session, and compare what you see to the progression in this guide. Then choose one improvement—raise or lower the rim, switch ball sizes, or upgrade to a better adjustable system—so your basketball equipment supports how your child actually learns to play.
Frequently Asked Questions
What is the standard basketball rim height, and why does it matter for kids?
The standard basketball rim height for regulation play is 10 feet, measured from the playing surface to the top of the rim. That is the official height used in most middle school, high school, college, and professional basketball settings. For younger players, however, that number should be treated as the long-term destination rather than the automatic starting point. Rim height has a direct effect on how kids learn to shoot, pass, finish at the basket, and move on the court.
When the hoop is set too high for a child’s current strength and coordination, players often compensate by using poor mechanics. Instead of developing a smooth shooting motion with balance, arc, and follow-through, they may heave the ball from the chest, twist their torso, drop the elbow, or launch the ball with two hands from below the waist. Those habits can become hard to undo later. By contrast, an age-appropriate and ability-appropriate rim height allows young players to practice proper form, build confidence, and experience success while still being challenged.
It also matters for enjoyment and safety. If every shot feels impossible, many kids lose interest quickly. A lower hoop creates more realistic scoring opportunities, encourages repetition, and helps players stay engaged. It can also reduce unnecessary strain caused by forcing the body to generate power it does not yet have. In short, the right rim height supports skill development first, which is usually the best path toward eventually thriving on a 10-foot basket.
At what age should kids move up to a 10-foot basketball hoop?
There is no single perfect age for every child to move to a 10-foot hoop, because age alone does not capture readiness. Some players are physically and technically prepared earlier, while others benefit from more time on a lower basket. In general, many children begin encountering 10-foot rims consistently somewhere in the late elementary to middle school years, especially if league rules require it. Even so, the better question is not simply “How old is my child?” but “Can my child use proper mechanics and still be successful at this height?”
A good transition usually happens when a player can shoot with control rather than strain. That means they can get the ball to the rim using balanced footwork, a repeatable motion, reasonable arc, and one fluid release instead of flinging the ball. They should also be able to make passes, layups, and short jump shots without sacrificing form. If raising the hoop to 10 feet immediately causes dramatic mechanical breakdown, the player may not be ready to train there full time yet.
League structure also matters. If a child plays in a division that uses 10-foot rims, they need exposure to that height so game situations do not feel unfamiliar. But that does not mean every practice at home must be exclusively at 10 feet. Many families and coaches use a blended approach: train some drills on the game-height basket, then lower the hoop for form shooting, finishing reps, and confidence-building work. This approach respects both development and competition. For most kids, moving up to 10 feet works best as a gradual transition based on readiness, not a sudden jump based only on birthday milestones.
How can parents tell if a lower rim is helping development or holding a player back?
A lower rim is helping when it allows the player to practice real basketball skills with better technique, better rhythm, and better confidence. You will usually see smoother shooting mechanics, a more natural release, improved touch, and more willingness to attack the basket. The player tends to look athletic rather than overpowered by the task. A productive lower-rim setup should make practice look like skill-building, not just easier scoring for the sake of entertainment.
On the other hand, a lower rim may start holding a player back if it no longer provides enough challenge or no longer matches the demands of the games they play. For example, if a player can comfortably shoot with excellent form and consistent range on a lower setting but struggles badly every time they return to regulation height, they may need more structured exposure to 10 feet. Another sign is when a child begins relying on habits that do not transfer well, such as flat trajectories, exaggerated jumping on every shot, or unrealistic finishing angles that only work because the hoop is low.
The best test is transfer. Ask whether the skills developed on the lower rim carry over to the next height. If they do, the lower basket is doing its job. If they do not, it may be time to raise the hoop incrementally or divide training sessions between heights. Parents should think of adjustable hoop settings as tools, not labels. Lower is not “babyish,” and 10 feet is not automatically “better.” The right setting is the one that produces sound mechanics now while preparing the player for regulation play later.
What factors matter more than age when deciding rim height for a young basketball player?
Several factors matter more than age by itself. The biggest ones are strength, coordination, shooting mechanics, confidence, and the environment the child is playing in. Two children who are the same age can be at very different stages physically and athletically. One may have the balance and upper-body strength to shoot correctly on a higher rim, while another may still need a lower setting to avoid developing compensations.
Physical development is important because basketball is not just about getting the ball to the hoop. It is about getting the ball there with control. A player may technically be able to reach a 10-foot rim, but if every shot requires maximum effort, then the training effect is often negative. Coordination matters just as much. Young players need to connect footwork, timing, hand placement, and follow-through. If the basket is too high, those pieces often fall apart under the demand for extra power.
Confidence is another major factor. Kids who experience appropriate challenge tend to practice longer and engage more deeply. Kids who constantly feel overmatched may become frustrated and less willing to experiment, compete, or keep playing. League and team rules also matter, because players need to prepare for the height they will face in games. Finally, the purpose of the session should guide the choice. If the goal is form shooting and skill acquisition, a lower hoop may be ideal. If the goal is game simulation, rebounding angles, or decision-making under real conditions, 10 feet may be the better option. Looking at all of these factors together gives a much clearer answer than age alone ever can.
Should kids practice on multiple rim heights while working toward 10 feet?
Yes, in many cases practicing on multiple rim heights is one of the smartest ways to build skills without rushing development. Using more than one height lets players work on proper mechanics at a level that suits their body today while still gaining experience on the regulation basket they may need for games. This reduces the all-or-nothing pressure that often comes with the question of when to “move up.” Development is rarely a single switch. It is usually a progression.
For example, a player might begin a session with form shooting, one-hand touch shots, and finishing drills on a lower rim to reinforce alignment, arc, and confidence. Later in the same workout, they might raise the basket for free throws, game-speed layups, or spot shooting so they can adapt those mechanics to regulation conditions. That combination often produces better long-term results than forcing every drill on a rim that is too difficult or, on the other hand, never exposing the player to the height they will eventually need.
The key is being intentional. Lower settings should be used to teach and refine, not to avoid challenge forever. Regulation height should be introduced in manageable ways so the player learns to adjust without losing form. Families with adjustable hoops are in a great position to do this. Coaches can also structure practices so younger or developing players spend part of their training on baskets that fit their current needs. When used thoughtfully, multiple rim heights help bridge the gap between beginner success and full 10-foot readiness, which is exactly what most young players need.