
Teaching a child to shoot a basketball starts with understanding that good form is not a miniature version of an adult jumper. A young player’s body is still developing, so the right coaching approach changes by age, strength, coordination, and confidence level. In youth basketball, shooting instruction should build mechanics that a child can repeat under light pressure, then gradually adapt those mechanics as the player grows stronger and more skilled.
When coaches talk about shooting form, they usually mean stance, balance, hand placement, release, arc, and follow-through. For kids, those pieces matter, but sequence matters even more. If a child cannot control the ball with balance and rhythm, detailed corrections on wrist snap or elbow angle will not stick. I have found that the best youth shooting sessions start with simple cues the player can feel immediately: feet set, eyes on target, ball up smoothly, finish high.
This topic matters because shooting habits form early, and poor habits are hard to unwind later. Many young players learn to fling the ball from the hip, twist their shoulders, or shoot two-handed from the chest just to reach the rim. Those compensations may help in the moment, but they slow development. Age-appropriate coaching protects confidence while building efficient mechanics, which is why this article serves as a central youth basketball coaching guide for parents, trainers, and team coaches.
A practical youth basketball shooting plan also recognizes that not every child progresses at the same pace. A seven-year-old beginner, a ten-year-old recreational player, and a thirteen-year-old travel athlete need different drills, different expectations, and often different basket heights or ball sizes. The goal is not to force textbook form too early. The goal is to create a repeatable shot that is biomechanically sound for the child in front of you, then improve it step by step.
Start with age-appropriate expectations and equipment
The fastest way to damage a young shooter’s form is to ask for range before the child has the strength for it. In youth basketball coaching, proper equipment is not optional. It shapes movement. A ball that is too heavy encourages a push shot. A rim that is too high encourages a heave. If you want clean mechanics, scale the task to the athlete.
For most young players, a smaller ball supports better hand placement and control. Many programs use a size 3 or 4 ball for very young children, a size 5 for many players ages nine to eleven, and a size 6 or 7 as athletes get older depending on league rules. Rim height also matters. Research and long-term coaching experience both point in the same direction: when basket height matches developmental ability, players show better arc, cleaner release, and more willingness to practice form instead of survival shooting.
Expectations should also change by age band. Ages five to seven should focus on coordination, target awareness, and one-motion rhythm near the basket. Ages eight to ten can begin learning more structured mechanics, including guide-hand discipline and balanced footwork. Ages eleven to thirteen can handle detailed shooting work, game-speed footwork, and shot preparation off the catch or dribble. High school players can refine advanced details such as pocket timing, shot versatility, and decision-making against contests.
Parents often ask when a child should stop shooting with two hands. The answer is not a strict birthday. A two-hand set shot is common early, but by the time a child can generate force from legs and core, coaching should guide the shot toward a dominant-hand release with a light guide hand. The transition should be progressive, not punitive. If a young player loses all confidence during the change, reduce distance first instead of demanding perfect technique from regulation range.
Teach the shooting foundation in a sequence kids can repeat
The most effective way to teach a kid to shoot a basketball is to coach the shot in a repeatable order. I use a simple progression: stance, grip, load, lift, release, finish. This keeps the lesson concrete and gives the child a checklist that makes sense under pressure.
Stance comes first. Feet should usually be about shoulder width apart, knees soft, and weight balanced on the middle of the feet. Some children are comfortable with toes pointed directly at the rim; others shoot better with a slight turn, especially on the shooting side. That small turn is normal and often helpful because it aligns shoulder, elbow, and wrist more naturally.
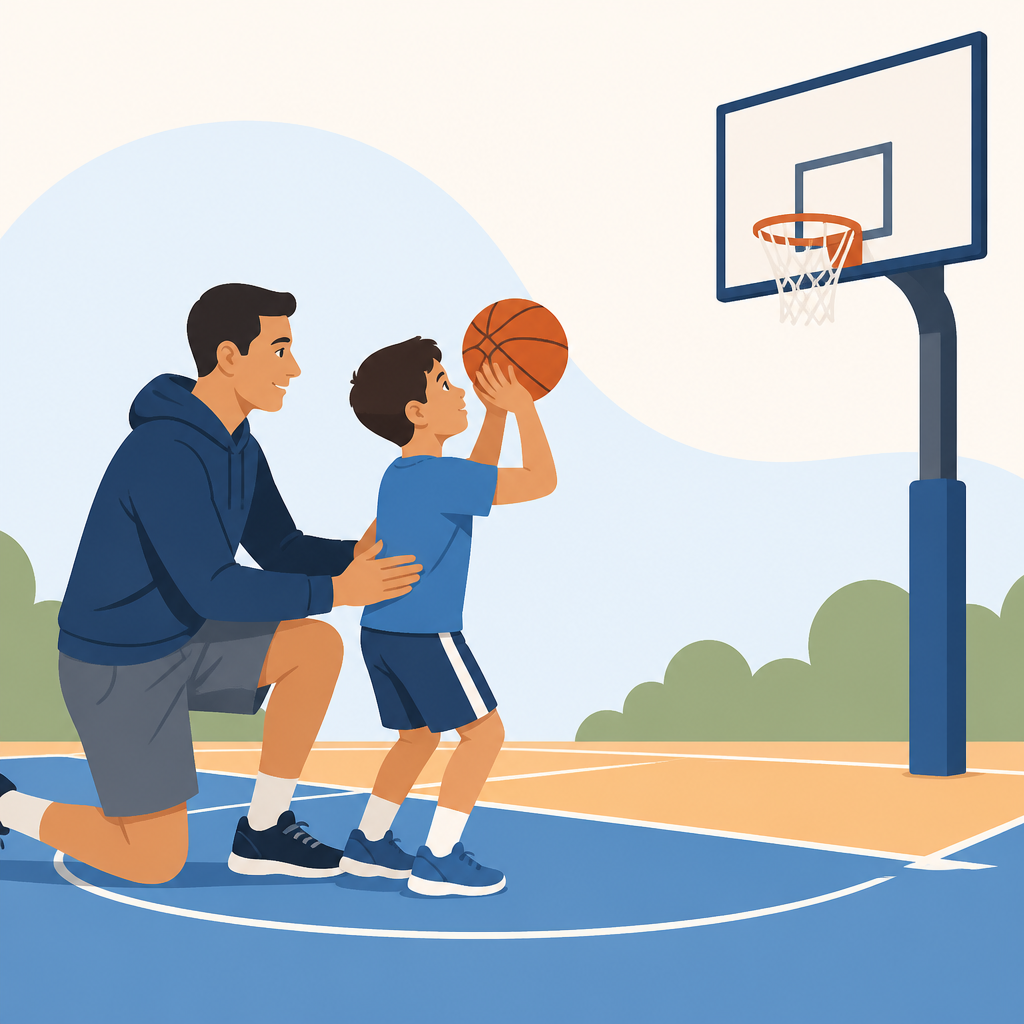
Grip comes next. The shooting hand sits under and slightly behind the ball, with fingers spread comfortably. The guide hand rests on the side, not behind the ball. Young players commonly let the guide hand push, which creates side spin and inconsistent misses. A useful cue is “guide hand helps, shooting hand finishes.” Kids understand that quickly when they see the ball rotate cleanly off one hand.
Load and lift connect the lower body to the release. The ball should not dip wildly to the waist or swing behind the head. Instead, it moves upward in one smooth path as the player bends lightly through hips, knees, and ankles. This is where rhythm develops. When the legs and arms work together, the shot feels easier and the release becomes more repeatable.
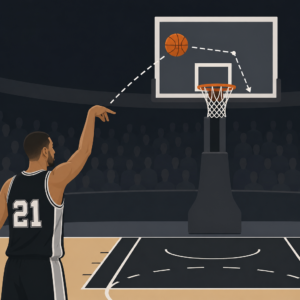
At release, the elbow does not have to be perfectly under the ball in a rigid textbook line, but it must stay organized enough to send force toward the rim. Finish matters because it reveals what happened before it. A high follow-through, relaxed wrist, and balanced landing usually signal a connected motion. If a child falls sideways, fades unnecessarily, or snaps the guide hand forward, go back to balance and sequence before making the cue more technical.
Match coaching cues to the child’s stage of development
Children learn shooting best when feedback is short, specific, and immediately usable. Younger players do not benefit from hearing six corrections at once. They need one feel-based cue, one target, and lots of successful repetitions from makeable spots. In practical youth basketball coaching, that usually means starting within five feet of the basket and praising clean mechanics more than makes.
Older children can process more detail, but even then the cue should fit the problem. If the miss is short, the issue may be lack of leg drive, a low release, or a heavy ball for the player’s current strength. If the miss goes left or right, check the guide hand, shoulder alignment, or whether the child is drifting. Diagnose the cause before giving the correction. Generic commands like “bend your knees” or “follow through” are often too broad to solve the real problem.
The table below shows practical age-appropriate form priorities that work well across beginner and intermediate settings.
| Age Range | Primary Goal | Best Coaching Cues | Common Mistake | Recommended Drill Focus |
|---|---|---|---|---|
| 5–7 | Coordination and confidence | Eyes on rim, feet still, finish high | Throwing from the chest | One-hand form shots close to basket |
| 8–10 | Build repeatable release | Guide hand on side, smooth up, hold finish | Guide-hand push | Wall shooting, form shooting, short-range bank shots |
| 11–13 | Add rhythm and footwork | Shot ready, dip small, land balanced | Rushing the catch and fading | Catch-and-shoot reps, pivot into shot, one-dribble pull-ups |
| 14+ | Game-speed consistency | Same shot, faster prep, read contest | Changing mechanics under pressure | Movement shooting, closeout reads, fatigue shooting |
This structure helps coaches stay patient. A six-year-old does not need advanced footwork language. A twelve-year-old does not need endless stationary reps with no transfer to real play. Matching the cue to the athlete makes development faster and less frustrating for everyone involved.
Use drills that protect form before adding distance and pressure
Good shooting drills for kids are not just busy work. They are filters that reward correct mechanics and expose bad habits early. The first filter is distance. If form breaks down outside eight feet, move back in. The second filter is speed. If a player can shoot well standing still but loses mechanics when catching the ball, slow the drill and rebuild from the feet up.
Form shooting remains the foundation at every age. Start directly in front of the rim with one hand, then add the guide hand lightly, then add a small knee bend. A wall drill also works well because it teaches straight-line release and backspin without worrying about makes. For younger players, bank shots from close range can build touch and confidence, especially when the player is still learning aim.
As players improve, use drills with clear purpose. Around-the-world can be useful if the spots are close enough for proper mechanics; from long range it often becomes a bad-habit contest. Catch-and-shoot from short corners and elbows teaches preparation. Pivot-and-shoot drills connect footwork to balance. One-dribble pull-ups help older kids learn to stop under control instead of spraying the ball off rushed movement.
Pressure should be added carefully. Defenders, timers, and competitions are helpful only after the player can organize the shot without them. In practice, I like a simple progression: make five with great form, then add a pass, then add a decision, then add a live contest. That sequence mirrors how sound youth basketball skills transfer to games. If you skip straight to speed and pressure, the child usually returns to survival mechanics.
Correct common youth shooting mistakes without hurting confidence
The most common shooting mistake in kids is using the upper body alone. You see the ball start low, the shoulders tense, and the arms shove it forward. Usually the cause is not laziness. It is a mismatch between the task and the player’s strength. Move closer, use the right ball, and restore rhythm. Once the child can feel power coming from the floor, many upper-body problems fade quickly.
Another common issue is guide-hand interference. The ball leaves with side spin, the elbow flares, and misses spray sideways. The fix is rarely to clamp the elbow unnaturally. Instead, teach the guide hand to stay on the side and come off quietly as the shooting hand extends. One-hand form shots, especially from a spot where the child can make several in a row, are excellent for this.
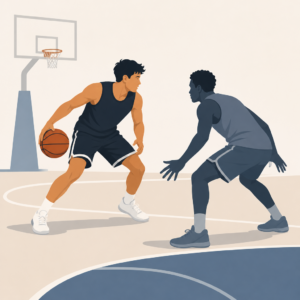
Some players also jump forward or sideways on every shot. A slight natural drift is normal, especially off movement, but large drift in a basic set shot usually signals poor balance or rushed timing. Watch the feet before watching the hands. Balanced shooters tend to load evenly, rise under control, and land in line with the target. That is easier to teach through slow catch-and-shoot reps than through repeated verbal correction alone.
Confidence deserves direct coaching attention. Children know when they are struggling, and too much technical criticism can make them guarded and mechanical. I prefer a ratio of one correction to several successful reps. Let the player feel the right motion, not just hear about the wrong one. A child who believes the shot is improving will practice more, and volume with sound mechanics is what creates lasting change.
Build a complete coaching plan around shooting, not just isolated mechanics
A hub article on youth basketball coaching should make one point clearly: shooting development does not happen in isolation. A child shoots better when footwork, passing, finishing, and decision-making improve alongside form. The best coaches connect these pieces. For example, a catch-and-shoot rep should include getting the hands ready, stepping into the pass, seeing the rim early, and finishing balanced. That is basketball, not just shooting practice.
Practice design matters. Short, frequent sessions beat occasional marathon workouts for young players. Ten to twenty focused minutes of form work several times per week usually outperforms one long session full of fatigue and sloppy reps. Track simple benchmarks such as makes from close range, clean backspin, balanced landings, and shooting percentage from age-appropriate spots. This gives the child visible progress without obsessing over deep-range numbers too early.
It also helps to organize development by season. In the preseason, prioritize mechanics and confidence. During the season, maintain form while adding game-speed decisions. In the offseason, rebuild weak points, whether that is leg drive, shot prep, or touch with the non-dominant hand around the basket. Coaches using tools like HomeCourt, Noah Basketball, or simple phone video can identify trends, but technology should confirm what the eyes already see, not replace coaching judgment.
Finally, remember that a great youth shooter is not the child who can occasionally make a long shot. It is the player who can produce the same motion repeatedly from appropriate game distances, under manageable pressure, with confidence. Teach that standard early and patiently. If you coach age-appropriate form, use the right equipment, and progress from balance to rhythm to pressure, you give a young athlete a shot that can keep improving for years.
Teaching a kid to shoot a basketball well means matching instruction to the child instead of forcing adult expectations onto a growing body. The key ideas are straightforward: use the right ball and basket height, start close enough for success, teach the shot in a clear sequence, and add distance or pressure only when mechanics stay intact. This approach builds both form and confidence, which is why it is the most reliable foundation for long-term youth basketball development.
For coaches and parents, the real advantage of age-appropriate shooting instruction is efficiency. You spend less time fixing avoidable bad habits later because you did not allow them to harden early. You also create a better practice environment. Kids enjoy training more when they can feel progress, make shots with proper technique, and understand exactly what each drill is teaching. That combination keeps them engaged and willing to work.
As a coaching hub within youth basketball, this topic connects naturally to footwork, passing, player development planning, practice design, and game confidence. Strong shooting instruction supports all of those areas. A player who can get balanced, prepare the hands, and release consistently becomes easier to coach across the floor. That is why shooting is not just one skill among many. For young athletes, it is a gateway skill that teaches discipline, body control, and repeatable technique.
If you are coaching a young player now, begin with one simple step at the next practice: move closer to the basket and demand cleaner form, not more range. Then build from there. Consistent, age-appropriate reps will do more for a child’s shot than any quick fix. Use this framework as your starting point, apply it patiently, and your young shooter will develop mechanics that hold up as the game gets faster and the rim feels farther away.
Frequently Asked Questions
What is the best age to start teaching a child how to shoot a basketball correctly?
The best time to start is as soon as a child shows interest, but “correctly” needs to be defined by age and stage of development. For very young players, usually ages 5 to 7, the goal is not a polished jump shot. It is learning the basic ideas behind shooting: balance, eyes on target, using the shooting hand under the ball, and finishing with a soft follow-through. At this age, children often do not have the strength to shoot with textbook form from a standard basket, so expecting a full-size shot can create bad habits like heaving the ball from the hip, twisting the shoulders, or pushing with both hands.
As kids move into the 8 to 10 range, many are ready for more structured instruction. This is a strong window for building repeatable mechanics because coordination improves and children can better understand simple cues. You can begin teaching a more organized shooting sequence, but it still needs to match the child’s strength. By ages 11 to 13, many players can handle more traditional shooting concepts, including rhythm into the shot, better alignment, and learning how lower-body power supports the release. The key is not chasing adult-looking form too early. Good youth shooting instruction meets the child where they are physically and mentally, then layers in better mechanics as they grow.
Should kids use the same shooting form as adults?
No. Kids should learn the same core principles, but they should not be forced into an adult jumper before they are physically ready. The foundations of good shooting stay consistent at every level: balance, controlled hand placement, eyes on the target, smooth upward motion, and a relaxed follow-through. What changes is how those principles look in a younger body. A child has less strength, less coordination, and shorter limbs, so the motion will naturally be simpler and sometimes slightly different than what you would see from a high school, college, or professional shooter.
For example, a young player may need a slightly lower set point, a smaller dip, or less vertical lift to generate enough force without distorting the shot. That is normal. What coaches want to avoid is teaching a child to copy the outward appearance of an adult shot while ignoring whether the child can actually control the ball. If a player has to flare the elbow badly, throw the guide hand into the release, or lean dramatically just to reach the rim, then the environment is too demanding. That usually means the basket is too high, the ball is too heavy, the distance is too far, or all three. Instead of forcing an adult form, teach age-appropriate mechanics that are efficient, repeatable, and likely to improve as the child gets stronger.
How can I tell if a basketball hoop or ball is too big for my child’s shooting development?
You can usually tell by watching how the child creates power. If nearly every shot starts from the waist, the ball swings behind the head, both hands push hard at release, or the child jumps forward and twists just to get the ball to the rim, those are signs the setup may be too difficult. Another clue is inconsistency in mechanics. A child might look fairly balanced on close shots but completely lose form one or two steps farther out. That often means the player has reached the edge of their current strength and is no longer practicing sound shooting habits.
In a healthy developmental setup, the child should be able to shoot with a controlled motion, keep the shooting hand doing most of the work, and finish with a relaxed follow-through on a meaningful number of attempts. The shot does not need to be perfect, but it should not look like a full-body launch every time. Using a lighter youth ball, lowering the rim when possible, and moving the player closer to the basket can make a major difference. This is not “making it easier” in a negative sense. It is creating conditions where proper mechanics can actually be learned. Once the child can repeat good form under light pressure, distance and difficulty can gradually increase without sacrificing the foundation.
What shooting cues work best for young players without overwhelming them?
The best cues are short, visual, and easy to repeat. Young players usually respond better to two or three simple reminders than to a long technical explanation. Good examples include “feet set,” “eyes on the target,” “one hand under, one hand on the side,” “up and through,” and “hold your follow-through.” These cues help a child organize the shot without thinking about too many body parts at once. If you overload them with details about elbow angle, wrist flexion, shoulder alignment, knee timing, and release window all at once, they often become stiff and confused.
It also helps to teach in priority order. Start with balance and hand placement. Then work on a smooth upward path and finishing the shot. Once those habits are more stable, you can address details like rhythm, footwork into the catch, or how to generate power from the legs without rushing the release. Language matters too. Kids usually improve faster when the coaching tone is calm and confidence-building. Instead of saying “don’t shoot like that,” say “let’s try getting the ball started a little higher” or “that one looked smoother when you stayed balanced.” Positive, specific feedback helps children connect the feel of a better shot to the result, which is exactly how repeatable mechanics are built.
How should shooting instruction change as a child gets older and stronger?
Shooting instruction should evolve from simple pattern-building to more refined mechanics and game application. For beginners and younger players, the emphasis should be close-range repetition with excellent balance and a soft release. They need to feel what a controlled shot is before they worry about range or speed. Drills should be simple, successful, and focused on making the same motion over and over from manageable distances. This is where confidence starts. A child who sees the ball go in with good form is much more likely to buy into the process.
As the player grows stronger, you can begin expanding the shot without changing its identity. That means teaching how to use the legs more effectively, how to keep the guide hand quiet, how to maintain alignment while moving, and how to transfer good form from stationary shots to catch-and-shoot and off-the-dribble situations. Older kids can also handle more feedback about rhythm, timing, and decision-making. The important point is that range should be earned, not forced. If a player’s mechanics break down badly from a new distance, move them back in and rebuild. Over time, strong youth shooters are developed by protecting form first, then adding strength, distance, and pressure in a logical progression. That approach creates shots that hold up not just in practice, but in real games as the child matures.